
01 August 2026
Built-in Shower Bench Guide 2026: Design & Install | Mudelar
Considering a built-in shower bench? Our 2026 guide covers materials, waterproofing, and design for your walk-in shower seat in Portugal. Get a free quote.
As a technical lead at Mudelar, I’ve overseen countless bathroom renovations across Portugal, from sleek apartments in Lisbon to family homes in Porto. One feature that consistently elevates a bathroom from purely functional to a personal spa is the built-in shower bench. It adds a touch of luxury, enhances accessibility, and provides practical convenience. A well-designed shower seat isn't just an add-on; it's an integrated part of a cohesive and comfortable design. In this guide, I'll walk you through everything you need to know about planning and installing the perfect built-in shower bench, covering the crucial details of construction, waterproofing, materials, and ergonomics to ensure a beautiful and durable result.
Quick summary
- Design and Planning First: Before any work begins, determine the ideal size, style (corner, floating, full-width), and location for your shower bench to ensure it meets your needs.
- Solid Structure is Essential: The core of the bench must be robust, built from either traditional masonry (brick) or modern, high-density foam board for stability and longevity.
- Waterproofing is Non-Negotiable: This is the most critical step. A flawless waterproofing membrane, whether liquid-applied or a sheet system, must be installed to prevent leaks and water damage.
- Material Selection Matters: Choose a durable, non-porous, and slip-resistant surface material like rectified porcelain tile or a solid engineered quartz slab for easy maintenance and safety.
- A Proper Slope is Crucial: The bench surface must be constructed with a subtle slope (around 2%) towards the shower drain to prevent water from pooling.
- Seamless Integration is the Goal: A well-executed built-in shower bench should blend seamlessly with the shower walls and floor, creating a unified and high-end look.
Table of contents
- What Exactly is a Built-in Shower Bench?
- Structural Foundations: Building a Bench That Lasts
- The Critical Step: Flawless Shower Bench Waterproofing
- Choosing the Right Surface Material
- Design and Ergonomics: Getting the Dimensions Right
- The Installation Process: A Step-by-Step Overview
What Exactly is a Built-in Shower Bench?
A built-in shower bench is a permanent, structural seat constructed within a shower enclosure. Unlike a freestanding stool or a fold-down seat, it is fully integrated into the shower's walls and floor, finished with the same or complementary materials. This integration provides superior stability, durability, and a much more polished, deliberate aesthetic. In our projects across Portugal, from Braga to Setúbal, we've seen a significant rise in requests for these features in both new builds and major renovations.
The primary appeal of a built-in shower bench lies in its dual function. It offers a comfortable and secure place to sit, transforming the daily shower into a more relaxing experience. For many, it's a simple luxury. For others, particularly those with mobility concerns or planning for future needs, it is an essential element of accessible design, providing safety and independence. It eliminates the clutter and potential instability of temporary seating solutions.
Types of Built-in Benches
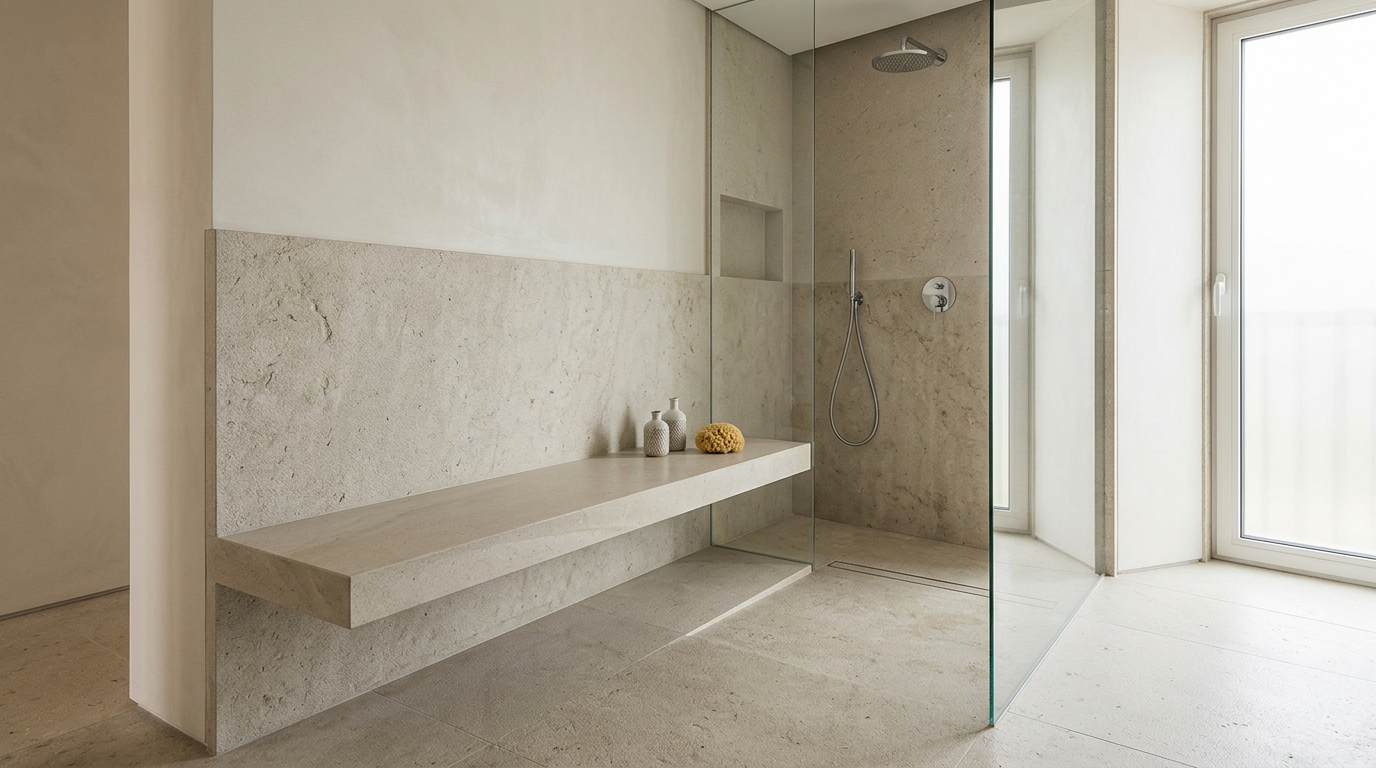
There are three primary styles of built-in benches, each suited to different shower sizes and aesthetic goals. A full-width bench spans the entire length of one shower wall, offering generous seating and a strong linear design element. A corner bench is a space-saving option ideal for smaller showers, fitting neatly into a 90-degree corner. Finally, a floating bench is cantilevered from the wall without visible support underneath, creating a modern, minimalist look and making the shower floor easier to clean.
Benefits Beyond Seating
While seating is its main purpose, a built-in bench offers other practical advantages. It serves as a convenient, waist-height shelf for placing toiletries like shampoo and shower gel, keeping them within easy reach without cluttering the floor or requiring multiple niches. It also acts as a stable and comfortable footrest for shaving, a small detail that many of our clients in the Lisbon area greatly appreciate. Essentially, it adds a layer of practical functionality that enhances the entire showering experience.
Structural Foundations: Building a Bench That Lasts
The long-term stability and durability of your built-in shower bench depend entirely on its underlying structure. This is not a place to cut corners. The frame must be capable of supporting significant weight while also being completely resistant to moisture and decay. At Mudelar, we primarily use two proven methods for constructing the bench's core, depending on the project's specifics and the existing property structure.
A professionally built frame is the skeleton upon which the entire bench is built. It must be perfectly level (before the slope is added), square, and securely anchored to the shower wall studs. Any weakness in this initial stage will inevitably lead to problems later on, such as cracked tiles or grout, or even structural failure. This is why professional expertise is so crucial from the very beginning of the process.
Masonry Construction
In many Portuguese homes, especially older properties undergoing renovation in cities like Porto, a traditional masonry frame using brick and mortar is a very effective and robust method. We construct a solid base using lightweight thermal bricks, which are then rendered to create a smooth substrate for the waterproofing layer. This method provides immense strength and is naturally resistant to decomposition. It's a time-tested technique that, when done correctly, creates a bench that is literally part of the house's structure.
Foam Board Construction
The more modern approach involves using high-density, waterproof extruded polystyrene foam boards, such as those from Schluter-KERDI-BOARD or Wedi. These pre-fabricated structural panels are lightweight, easy to cut and shape, and inherently waterproof. They are assembled to form the bench structure and fixed directly to the wall framing and floor. This method significantly speeds up the installation process and integrates perfectly with sheet-style waterproofing systems, creating a fully sealed, monolithic substrate ready for tiling.
The Critical Step: Flawless Shower Bench Waterproofing
If there is one step you absolutely cannot get wrong, it is waterproofing. I’ve seen firsthand how a small failure in the waterproofing layer can lead to catastrophic damage, including mould growth, rotting structural timbers, and tile delamination. A built-in shower bench has multiple corners, seams, and changes of plane, all of which are potential weak points for water ingress. Therefore, the entire bench structure, along with the surrounding walls and floor, must be encapsulated in a continuous, impenetrable waterproof membrane.
Before any tile or stone is installed, the waterproofing system must be meticulously applied, paying special attention to all corners and joints where the bench meets the walls and floor. These transitions are the most vulnerable areas. We use specialized sealing bands and pre-formed corners to reinforce these points, ensuring a completely watertight seal. For our clients' peace of mind, we often perform a 24-hour flood test after the membrane has cured, filling the shower base with water to confirm the integrity of our work before proceeding.
Liquid-Applied Membranes
One common method is the use of a liquid-applied waterproofing membrane. This involves painting on several coats of a flexible, rubber-like compound over the bench structure and surrounding walls. When cured, it forms a seamless, monolithic barrier that is bonded directly to the substrate. This method is particularly effective for complex shapes and ensures there are no seams for water to potentially exploit. It's a technique that requires careful application to achieve the correct thickness throughout.
Sheet Membranes
Another industry-leading method is the use of sheet membranes, like the Schluter-KERDI system. This involves covering the bench and shower area with a pliable, polyethylene sheet. The sheets are overlapped, and the seams, corners, and fastener points are sealed with a special waterproof sealant (KERDI-FIX). This system creates a reliable and consistent waterproofing layer and is our preferred method at Mudelar for its proven performance and integration with other system components like drains and pre-formed niches.
Choosing the Right Surface Material
Once the structure is built and waterproofed, you can choose the surface material. This choice defines the bench's final look, feel, and maintenance requirements. The ideal material should be non-porous (or sealed to be so), slip-resistant, durable, and aesthetically pleasing. It should either match the shower walls for a seamless, integrated look or provide a deliberate, attractive contrast.
When selecting a material, consider the maintenance aspect. Materials with fewer or no grout lines, such as a solid slab, are much easier to keep clean. If you choose tile, using larger format tiles and a high-performance, stain-resistant grout will minimise the cleaning effort. Our design team often helps clients in places like Aveiro balance aesthetics with practicality to find the perfect finish for their new shower.
Tiled Benches
Tiling the bench with the same material used on the shower walls is the most common approach. It creates a beautiful, cohesive look where the bench appears to grow out of the wall itself. We strongly recommend using rectified porcelain tiles, which are manufactured to have precise, straight edges. This allows for very thin grout lines (1-2mm), resulting in a more monolithic appearance and reducing the amount of grout that needs to be maintained. Porcelain is also extremely dense and non-porous, making it an ideal choice for a wet environment.
Solid Surface Slabs
For the ultimate in luxury and low maintenance, a single, solid slab of material is an excellent choice. Engineered quartz (from brands like Silestone or Compac) or natural stone like granite can be custom-cut to fit the bench perfectly. The primary advantage is the complete absence of grout lines, eliminating any potential for staining or mould growth. A solid slab provides a clean, sleek, and modern aesthetic. However, it requires precise templating and expert installation to ensure a perfect fit and proper sealing where the slab meets the wall tiles.
Design and Ergonomics: Getting the Dimensions Right
Proper ergonomic design is crucial for a built-in shower bench to be truly comfortable and functional. If it's too high, too low, too narrow, or too deep, it will feel awkward to use. Based on our extensive experience, we adhere to industry-standard dimensions that provide comfort for most adults while also ensuring safety.
The standard height for a shower bench seat is between 43 cm and 48 cm from the shower floor. This height allows most users to sit comfortably with their feet flat on the floor. The depth should be between 30 cm and 40 cm. A depth of 35 cm is often the sweet spot—deep enough for stable seating but not so deep that it excessively encroaches on the shower's standing area. Critically, the bench surface must have a slight slope of about 2% towards the drain to ensure water runs off completely and doesn't pool.
Integrating with Niches and Fixtures
A great design considers the shower as a whole system. The placement of your bench should be coordinated with your shower controls, shower head, and any storage niches. For example, the controls (like a thermostatic mixer from Grohe) should be easily reachable from the bench without having to stand up. A popular design we implement is to place a recessed shower niche in the wall just above the bench, providing convenient storage for toiletries. This kind of thoughtful integration makes the space more intuitive and enjoyable to use.
Corner vs. Full-Width Benches
The choice between a corner and a full-width bench largely depends on the size and layout of your shower. In smaller enclosures (e.g., 90x90 cm or 120x80 cm), a triangular or quadrant-shaped corner bench is the most practical solution. It provides a stable seat without compromising valuable standing room. In larger, walk-in showers, a full-width bench can create a stunning visual feature and offers more expansive seating, contributing to a luxurious, spa-like atmosphere that is highly sought after in renovations in areas like Cascais and Sintra.
The Installation Process: A Step-by-Step Overview
Installing a durable and beautiful built-in shower bench is a multi-stage process that demands precision at every step. While the exact steps can vary based on the chosen structure and materials, a typical professional installation follows a clear sequence to ensure a quality outcome.
- Framing and Construction: The first step is to build the core structure of the bench. This involves either erecting a masonry frame with bricks or assembling pre-fabricated foam board panels. The frame is securely anchored to the wall studs and subfloor.
- Waterproofing Application: Once the frame is complete, the critical waterproofing stage begins. The entire bench, along with the surrounding walls and shower floor, is meticulously covered with either a liquid-applied or sheet membrane. All seams, corners, and penetrations are sealed.
- Flood Testing: After the waterproofing has fully cured (typically 24 hours), we conduct a flood test. The shower drain is temporarily plugged, and the shower pan is filled with water for 24 hours to verify that the entire system is 100% watertight.
- Tile or Slab Installation: With the waterproofing confirmed, the finish material is installed. For tiles, this involves applying a suitable tile adhesive and carefully setting the tiles, ensuring clean lines and proper slope. For a slab, it is carefully lowered into place and secured with adhesive and sealed at the edges.
- Grouting and Sealing: For tiled benches, the gaps between tiles are filled with a high-performance, flexible, and mould-resistant grout. Finally, any joints between the bench and the walls, or where different materials meet, are sealed with 100% silicone sealant to allow for movement and provide a final layer of water protection.
Recommended materials and options
Request a free, no-commitment quote. We reply within 24 hours.
Request a quote →| Type | Features | When to choose |
|---|---|---|
| Rectified Porcelain Tile | Extremely durable, dense, non-porous, and water-resistant. Minimal grout lines for a clean look. | For a seamless, cohesive look that matches the shower walls and for excellent durability. |
| Engineered Quartz Slab | Non-porous, no grout lines, highly resistant to stains and bacteria. Sleek, modern aesthetic. (e.g., Silestone) | When you prioritise zero maintenance and a minimalist, high-end appearance. |
| Natural Stone (Sealed) | Unique, natural beauty (e.g., Granite). Very durable when properly sealed. | For a luxurious, unique look, provided you are committed to periodic re-sealing. |
| High-Density Foam Board | Lightweight, inherently waterproof, and provides thermal insulation. Speeds up installation. (e.g., KERDI-BOARD) | As the structural core for a fast, reliable, and perfectly waterproof installation. |
| Epoxy or Urethane Grout | Non-porous, stain-proof, and doesn't require sealing. Highly durable and flexible. | As a premium upgrade over cementitious grout for maximum durability and minimal maintenance. |
Quick comparison
| Feature | Tiled Bench | Solid Slab Bench |
|---|---|---|
| Aesthetics | Cohesive and integrated with shower walls | Sleek, minimalist, and monolithic |
| Maintenance | Requires regular cleaning of grout lines | Extremely easy to clean, no grout lines |
| Installation | Labour-intensive tiling and grouting | Requires precise templating and heavy lifting |
| Seamlessness | Creates a visually unified space | Provides a clean, unbroken surface |
| Material Options | Virtually limitless tile styles | Limited to available stone and quartz patterns |
Common mistakes to avoid
- Incorrect or No Slope: The most common mistake is building a perfectly flat bench. This allows water to pool on the surface, leading to soap scum build-up and potential water damage. The surface must have a slight but deliberate slope towards the drain.
- Inadequate Waterproofing: Simply relying on tile and grout to be waterproof is a recipe for disaster. Grout is porous. You must have a continuous, dedicated waterproofing membrane behind the tiles.
- Wrong Dimensions: A bench that is too high, low, or narrow will be uncomfortable and can even be unsafe. Always follow ergonomic guidelines for height and depth.
- Using Porous Materials: Avoid using porous natural stones like travertine or marble unless you are prepared to seal them regularly. Likewise, use a high-quality, dense grout to resist water absorption and staining.
- Forgetting Structural Support: A floating bench, in particular, requires robust internal support anchored securely to the wall framing. Failing to engineer this correctly can lead to the bench sagging or detaching from the wall.
- Poor Seam Management: All corners and joints where the bench meets the walls and floor are high-stress areas. They must be reinforced with flexible sealant (100% silicone), not rigid grout, to accommodate natural building movement.
- Ignoring Plumbing Locations: Failing to plan the bench in relation to the shower controls and shower head can result in an awkward and impractical layout. Design the entire system together.
Pre-project checklist
- Measure your shower's internal dimensions accurately.
- Decide on the bench type: corner, full-width, or floating.
- Finalise your choice of surface material (tile or slab) and grout.
- Confirm the final location of the shower mixer, shower head, and any hand-held wands.
- Plan the location and size of any integrated shower niches.
- Select a contractor with proven experience in shower waterproofing and tile installation.
- Ask to see examples of their previous work on built-in shower benches.
- Request a detailed project plan that explicitly outlines the waterproofing method.
- Ensure all materials, from the structural board to the grout, are specified in the contract.
- Discuss the project timeline, including curing times for waterproofing and grout.
How Mudelar handles it
At Mudelar, we believe a successful renovation is built on meticulous planning and expert execution. When a client wants a built-in shower bench, we manage the entire process through our turnkey service. Our design team works with you to integrate the bench seamlessly into your new bathroom layout, considering ergonomics, aesthetics, and functionality. Our skilled construction teams in Porto, Lisbon, and across our service areas handle the entire installation, from building a rock-solid frame to applying a flawless, flood-tested waterproofing system.
We use only high-quality materials from trusted suppliers like Roca, Grohe, and Silestone to ensure a durable and beautiful finish. By managing every step in-house, we guarantee that the highest standards are met, particularly on critical tasks like waterproofing. This approach provides our clients with complete peace of mind and a single point of contact throughout the project. To start planning your dream bathroom, get a free quote and let's discuss how we can help. Explore our services to see the full scope of what we do, or learn more about us.
Frequently asked questions (FAQ)
How long does it take to install a built-in shower bench?
Typically, installing a built-in shower bench as part of a full shower renovation adds about 3-5 working days to the project timeline. This includes framing, waterproofing, allowing for proper curing times (which is critical), tiling, and grouting. A project involving a custom-cut solid slab may require a slightly longer lead time for material fabrication.
Do I need a permit to add a shower bench in Portugal?
In most cases, adding a shower bench as part of an internal bathroom renovation does not require a municipal permit (licença). However, if the renovation involves significant structural changes to the building, or is part of a larger project, a permit may be necessary. We handle all necessary paperwork and consultations as part of our turnkey service.
Is a built-in shower bench worth it?
Absolutely. It adds significant comfort, luxury, and functionality to your daily routine. It's also a major plus for safety and accessibility, making your home more adaptable for the future. From a resale perspective, a well-executed walk-in shower with a built-in bench is a highly desirable feature that can increase your property's value.
What's the difference between a built-in bench and a freestanding stool?
A built-in bench is a permanent, stable, and integrated part of the shower's construction, offering superior safety and a more high-end aesthetic. A freestanding stool is a temporary, often less stable solution that can clutter the shower floor and may not be designed for constant water exposure, leading to rust or mould.
How do you clean a built-in shower bench?
Cleaning methods depend on the material. For solid quartz or stone slabs, a simple wipe-down with a pH-neutral cleaner is sufficient. For tiled benches, the same cleaner works well. The key is to regularly clean the grout lines with a soft brush to prevent soap scum and mildew build-up. Using a high-quality epoxy or urethane grout minimises this maintenance.
Can a built-in shower bench be heated?
Yes, a shower bench can be heated for an extra touch of luxury. This is achieved by installing a low-voltage electric heating mat, similar to those used for heated floors, directly underneath the tile or stone surface. It must be a system specifically rated for use in wet areas and installed by a qualified professional.
What is the best material for a shower bench seat?
The best materials are dense, non-porous, and easy to clean. Rectified porcelain tile is an excellent, durable choice that allows for a cohesive design. Engineered quartz slabs are a premium option that eliminates grout lines entirely, making them exceptionally hygienic and low-maintenance. Both are superior choices for the wet environment of a shower.
Can a shower bench be added to an existing shower?
While technically possible, it is a very complex and risky job. To do it correctly, you would need to remove the existing tiles on the walls and floor where the bench will be built to tie in a new, continuous waterproofing membrane. Simply building a bench on top of existing tiles is not a durable solution and will almost certainly lead to leaks. We almost always recommend it be done as part of a full shower renovation.
Conclusion
A built-in shower bench is more than just a seat; it's a transformative element that enhances comfort, safety, and the overall value of your bathroom. From the structural core and flawless waterproofing to the final ergonomic dimensions and material choices, every detail matters. Professional installation is not just recommended—it's essential to ensure the bench is not only beautiful but also safe and durable for years to come. If you're ready to elevate your showering experience with a custom-designed bench for your home in Porto, Lisbon, or anywhere in Portugal, our team at Mudelar is here to help. Request a free quote today to begin your bathroom renovation journey.
Ready to start your renovation?
Request a free, no-commitment quote. We reply within 24 hours.
Request a quoteLer em português: Bancos de duche fixos: Guia completo para segurança 2026 | Mudelar