
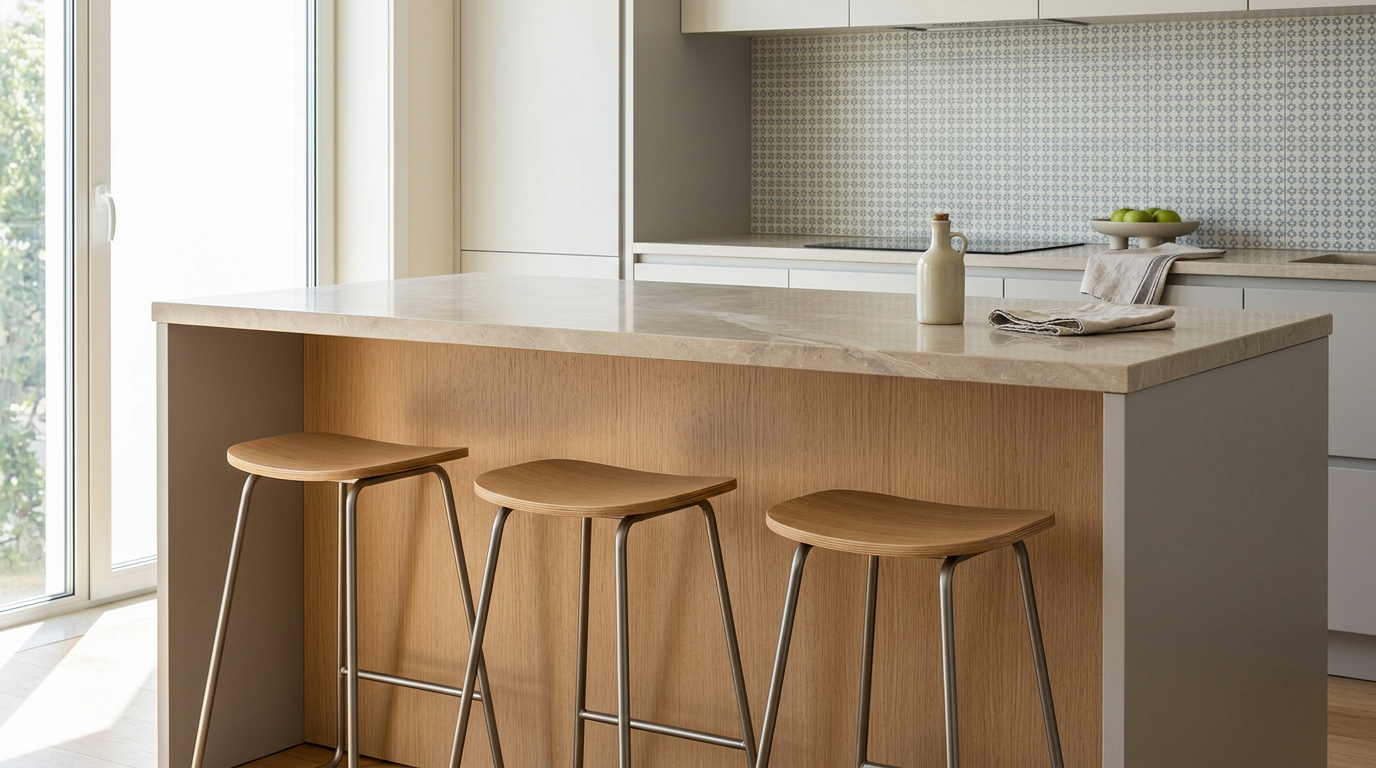
29 September 2026
Kitchen Island with Stools 2026: A Sizing Guide | Mudelar
Planning a kitchen island with stools? My guide covers essential sizing and ergonomics for comfort and flow in your Lisbon home. Get the perfect fit. Get a free quote.
Hi, I'm Marco Rodrigues, a project manager here at Mudelar. For over a decade, I've been helping families in and around Lisbon transform their homes, and one feature consistently tops the wish list: the kitchen island with stools. It's more than just extra counter space; it's the heart of the modern Portuguese kitchen, a place for breakfast, homework, and conversation. However, getting it right is a game of centimetres. An island that's too big can cripple your kitchen's workflow, while one with the wrong proportions is simply uncomfortable. This guide will walk you through the essential measurements and ergonomic principles I use on-site to ensure your new island is perfectly functional and inviting.
Quick summary
- Standard Heights: Most kitchen islands are either counter-height (90-92cm), matching the rest of your worktops, or bar-height (105-110cm), creating a distinct zone.
- Stool Sizing: The golden rule is to choose stools with a seat height that is 25-30cm lower than the island's countertop for comfortable legroom.
- Essential Clearance: For comfortable movement, allow a minimum of 90-100cm of clear floor space around the island for walkways. In working zones (between the island and other counters), aim for 110-120cm.
- Comfortable Seating: A countertop overhang of at least 30-40cm is crucial to provide adequate knee space so you're not perched on the edge of the stool.
- Space Per Person: Allocate at least 60cm of width for each stool to ensure people aren't bumping elbows while seated.
- Function Before Form: Always define the island's primary purpose—be it food prep, dining, or storage—before settling on its final dimensions.
- Landing Zones: If your island includes a sink or cooktop, ensure there is at least 30-40cm of clear counter space on each side for safety and convenience.
Table of contents
- Understanding the Role of a Kitchen Island in Your Home
- Critical Measurements: Height and Stool Pairing
- Ergonomics of Seating: Overhang and Spacing
- Planning for Flow: Clearance and Walkways
- Integrating Appliances and Features
- Material Choices for Durability and Style
- Recommended materials and options
- Quick comparison
- Common mistakes to avoid
- Pre-project checklist
- How Mudelar handles it
- Frequently asked questions (FAQ)
- Conclusion
Understanding the Role of a Kitchen Island in Your Home
A kitchen island is a chameleon. Its function changes depending on the family and the layout of the home. In many of the open-plan apartment renovations we manage in Lisbon and Porto, the island serves as a subtle divider between the kitchen and living areas. It anchors the space, providing a central point for daily life that goes far beyond simple meal preparation. Defining its primary role is the very first step in the design process, as this decision influences every measurement that follows.
Is it primarily for additional storage and workspace? Or is it the main dining spot for casual meals? Perhaps it's a social hub where guests can sit with a glass of wine while you cook. For many families, it's a combination of all three. By clarifying your priorities, we can design a kitchen island with stools that not only looks fantastic but also enhances your daily routine.
The Social Hub
For many of our clients, the most important function of their island is social. It becomes the new kitchen table. This is where kids do their homework under a parent's watchful eye, where you have a quick coffee and read the news, or where friends gather during a party. If this is your main goal, the design should prioritise comfortable seating, with ample legroom and a welcoming countertop material. You might also consider integrated charging points for phones and laptops, turning it into a truly modern family hub.
The Functional Workhorse
Alternatively, your island might be all about function. In a busy kitchen, it can house a second sink for prep work, a state-of-the-art induction cooktop, or simply provide a vast, uninterrupted surface for baking or large meal prep. In these cases, the layout is paramount. The placement of appliances, the choice of a durable, easy-to-clean countertop, and the integration of task lighting become the most critical design considerations. The seating might be secondary, perhaps just a couple of stools tucked at one end.
Critical Measurements: Height and Stool Pairing
Once you know your island's purpose, we can talk numbers. The most fundamental measurement is the height of the countertop, as this dictates the type of stools you'll need and the overall ergonomics of the space. There are two standard heights we work with, and the choice between them has a significant impact on the feel and function of your kitchen.
Getting this pairing right is non-negotiable for comfort. A stool that is too high or too low for the counter will be awkward to use and can even lead to back discomfort. The rule of thumb I always tell our clients is simple: measure the distance from the floor to the underside of the island countertop, then subtract 25-30cm. This will give you the ideal seat height for your stools, ensuring your legs fit comfortably underneath.
Counter-Height Islands (90-92cm)
A counter-height island is built to the same height as the rest of your kitchen worktops, typically 90-92cm from the floor. This creates a seamless, uniform look, extending the workspace horizon across the room. It's an excellent choice for food preparation, as you can move from the main counter to the island without adjusting your posture. The corresponding counter stools have a seat height of around 60-67cm. This lower seating height is often considered more comfortable and accessible, especially for children and older adults.
Bar-Height Islands (105-110cm)
A bar-height island, sometimes called a raised bar, stands taller at about 105-110cm. This two-tiered design, often with a lower counter-height section for prep, creates a clear visual separation between the cooking zone and the social area. One practical advantage is that the raised bar can help hide kitchen clutter from the view of an adjoining living or dining room. The required bar stools have a taller seat height of 75-80cm, creating a more perched, bar-like feel that can feel very social and dynamic.
Ergonomics of Seating: Overhang and Spacing
An island is only a comfortable place to sit if it's designed for humans. This is where ergonomics come in, and two factors are key: the countertop overhang (knee space) and the width allocated to each person. Ignoring these details is a common mistake that leads to an island where no one actually wants to sit. We've seen it in homes from Sintra to Setúbal – a beautiful island that goes unused because it's simply uncomfortable.
We design for real-world use. This means ensuring you can pull your stool in properly, rest your elbows on the counter, and eat a meal without feeling cramped. These measurements may seem small on a floor plan, but they make a world of difference in daily life. A well-designed seating area turns your island from a purely functional block into a welcoming feature.
Calculating Knee Space (Overhang)
The overhang is the section of the countertop that extends beyond the island's base cabinet. This is the space for your knees. Without it, you're forced to sit sideways or perch uncomfortably far from the counter. The minimum required overhang depends on the island's height:
- For a counter-height island (90cm), you need a deeper overhang of at least 38-40cm to comfortably fit your legs.
- For a bar-height island (110cm), you can have a slightly smaller overhang of 30-35cm because you sit more upright.
Allocating Width Per Stool
To avoid clashing elbows, each person needs their own personal space. The industry standard is to allow a minimum of 60cm of width per stool. If you want a more generous and comfortable experience, I recommend aiming for 70-75cm per person, especially if the stools have armrests or swivel. To calculate how many stools your island can accommodate, simply measure the length of the seating side and divide it by 60 (or your desired width). Remember to also leave about 15-20cm of space from the end of the counter to the first stool on each side.
Planning for Flow: Clearance and Walkways
Perhaps the most critical aspect of island planning—and the one most often overlooked in DIY projects—is the clearance around it. Your kitchen is a high-traffic area, and the island should not become an obstacle. In our initial on-site consultations at Mudelar, measuring for proper flow is a top priority. An island that obstructs movement between the sink, refrigerator, and stove (the classic 'work triangle') is a functional failure, no matter how beautiful it is.
The space around your island is defined as either a walkway (a path for moving through the room) or an aisle (a working space between the island and another counter). Each has different minimum requirements to ensure your kitchen remains efficient and safe. These rules are essential for creating a layout that works in practice, not just on paper.
Walkway Clearances (The 1-Metre Rule)
For any path where people will simply be walking past the island (not actively working), you need a minimum clearance of 90cm. However, I always push for at least 100cm (1 metre). This ensures that someone can walk by comfortably even if another person is seated at the island. In main traffic routes, for example, from a hallway to the back door, this wider clearance is absolutely essential to prevent bottlenecks in your home.
Aisle Clearances (Working Zones)
An 'aisle' is the space between the island and your main run of cabinets—the primary work zone. Here, you need more space. If it's a one-person kitchen, a minimum of 105cm is required to allow you to open cabinet doors, the dishwasher, or the oven without being trapped. In a kitchen where two people might be working back-to-back, this should be increased to a minimum of 120cm. This ensures two people can work efficiently without constantly bumping into each other.
Integrating Appliances and Features
A modern kitchen island with stools often does more than just provide seating. Many designs incorporate key appliances like sinks, cooktops, dishwashers, or wine fridges. This integration can massively boost your kitchen's functionality, but it requires careful planning. Each appliance has its own spatial and technical requirements that will impact the island's overall size and layout.
When we incorporate appliances, we always plan for 'landing zones'. These are dedicated, clear counter spaces on either side of a sink or cooktop. A landing zone is critical for safety and usability—it's where you place hot pans coming off the hob or dirty dishes before they go into the sink. Without these zones, the island can quickly become cluttered and hazardous. Our 3D designs at Mudelar help clients visualise this workflow long before installation begins.
Planning for Sinks and Dishwashers
Adding a prep sink to an island is a popular choice. It creates a highly efficient work station, separate from the main cleanup sink. When planning for a sink, you must account for the necessary plumbing lines and ensure there's a minimum of 45cm of clear counter on one side and 30cm on the other. A dishwasher is often placed next to the island sink for convenience. Remember that you'll need adequate aisle clearance (at least 105cm) to open the dishwasher door fully without blocking the walkway.
Safely Integrating a Cooktop
Placing a cooktop on the island turns the act of cooking into a more social experience. However, safety is the top priority here. You must have adequate landing zones of at least 30-40cm on each side for hot pots and pans. Furthermore, ventilation is a major consideration. You will need a powerful overhead extractor hood or a downdraft ventilation system that rises from the countertop, both of which have spatial and technical implications. Seating should also be placed a safe distance from any cooking surface to avoid splashes or burns.
Material Choices for Durability and Style
Request a free, no-commitment quote. We reply within 24 hours.
Request a quote →The materials you choose for your island will define its look, feel, and longevity. The countertop is the star of the show, and it needs to be tough enough to handle daily life. In our projects across Portugal, from coastal homes in Cascais to city apartments in Braga, we see a strong preference for materials that blend aesthetics with high performance.
For countertops, engineered quartz from brands like Silestone and Compac is incredibly popular. It's non-porous, highly resistant to stains and scratches, and comes in a huge variety of colours and patterns. Natural stones like granite remain a classic for their unique beauty, though they require more maintenance. For the island base, we often use high-quality moisture-resistant MDF finished with lacquer or laminates from durable brands like Egger or Kronospan, ensuring the structure stands up to the demands of a busy kitchen environment.
Recommended materials and options
| Type | Features | When to choose |
|---|---|---|
| Engineered Quartz | Non-porous, highly resistant to stains and scratches, uniform colour, wide variety of designs (e.g., Silestone, Compac). | You want a low-maintenance, highly durable surface with a consistent, modern look. |
| Natural Granite | Unique natural patterns, very hard and scratch-resistant, heat resistant. | You love a one-of-a-kind, natural look and are prepared for periodic sealing to prevent stains. |
| Solid Wood | Warm, natural aesthetic, can be sanded and refinished. Develops character over time. | You want a traditional or rustic feel and enjoy the natural patina of wood. Best for seating areas. |
| Stainless Steel | Extremely hygienic, heat-proof, and durable. Creates a professional, industrial look. | You're an avid cook looking for a professional-grade, seamless, and highly functional surface. |
| High-Pressure Laminate | Wide range of colours and patterns, durable and easy to clean. (e.g., Egger, Kronospan). | You need a versatile and resilient finish for the island's base cabinetry that matches your style. |
Quick comparison
Counter-Height vs. Bar-Height Seating
| Feature | Counter-Height Island (90cm) | Bar-Height Island (110cm) |
|---|---|---|
| Aesthetics | Creates a seamless, unified look with other kitchen worktops. | Creates a visual divide, defining the kitchen and social areas distinctly. |
| Prep Work Ergonomics | Excellent. The surface is at a comfortable standing work height. | Less ideal for prep. The raised level is too high for comfortable chopping. |
| Seating Comfort | Generally more comfortable for longer periods. Easy to get on/off. | More of a 'perched' feeling. Can be less comfortable for extended meals. |
| Safety for Children | Safer and more accessible for children and older individuals. | Less safe for small children due to the height. Requires more supervision. |
| Space Definition | Integrates the island fully into the kitchen workspace. | Helps to hide kitchen mess from adjoining living or dining areas. |
| Stool Type Required | Counter Stool (approx. 60-67cm seat height). | Bar Stool (approx. 75-80cm seat height). |
Common mistakes to avoid
- Making the Island Too Big. The most common error is creating a 'Goliath' island that dominates the room and obstructs workflow. Always respect the minimum clearance rules to maintain a functional kitchen.
- Forgetting the Overhang. A countertop with little to no overhang makes for incredibly uncomfortable seating. You must provide at least 30-40cm of clear knee space for anyone using the stools.
- Ignoring Walkway Clearance. Failing to leave at least 90-100cm for traffic paths creates frustrating bottlenecks. This is especially true in kitchens that are also thoroughfares to other parts of the house.
- Choosing the Wrong Stool Height. Buying bar-height stools for a counter-height island (or vice-versa) is a simple but costly mistake. Always measure your counter height first and choose stools that are 25-30cm lower.
- Poor Lighting Plan. An island needs dedicated task and ambient lighting. Relying on a single ceiling fixture will leave your new workspace in the shadows. Plan for pendant lights or focused recessed lighting.
- Not Planning for Electrics. In the modern kitchen, an island without power outlets is a missed opportunity. Plan for outlets for small appliances, laptops, and phone chargers during the design phase.
- Omitting Landing Zones. If your island has a cooktop or sink, you must include clear counter space on both sides. Not having a safe place to put down a hot pan or dirty dishes is a serious design flaw.
Pre-project checklist
Before you commit to a design, run through this simple checklist to ensure you've covered all the bases:
- Measure your total available kitchen space accurately.
- Define the island's primary functions: dining, prep, storage, social, or a mix?
- Map out your kitchen's 'work triangle' (sink, stove, fridge) to ensure the island doesn't block it.
- Decide on your preferred island height: a seamless counter-height or a distinct bar-height?
- Determine the maximum number of stools you want and can realistically fit.
- List all appliances or fixtures (sink, cooktop, outlets) you want to include in the island.
- Consider your lighting plan. Where will pendant lights or spotlights be positioned?
- Think about storage. Will you need deep drawers for pots, shallow drawers for cutlery, or open shelving?
- Gather inspiration photos that reflect the style and functionality you're aiming for.
- Consult with a professional to review your plan and get a realistic assessment.
How Mudelar handles it
At Mudelar, designing the perfect kitchen island with stools is a core part of our renovation process. We don't just build what's on a napkin sketch; we guide you through every decision to ensure the final result is perfect for your home and lifestyle. Our process begins with an in-depth on-site visit where we take precise measurements and discuss your needs. We then create detailed 3D renderings, allowing you to see exactly how the island will look and function in your space, from clearance to stool placement.
Our turnkey service means we handle everything. From selecting the right Silestone countertop and sourcing high-quality stools to managing the plumbing for a new sink and the electrical for pendant lighting, our in-house teams of skilled tradespeople ensure a seamless installation. We believe a great renovation is about expert planning and flawless execution. If you're considering a new kitchen, take a look at our services or learn more about us and our commitment to quality. When you're ready, it's easy to request a free quote.
Frequently asked questions (FAQ)
How much space do you need for a kitchen island with stools?
To comfortably fit a modest island with seating, you should ideally have a kitchen that is at least 3.5 metres wide. This allows for standard 60cm deep counters, a 90cm wide island, and two clearance zones of at least 100cm on either side for movement and functionality.
What is the standard height for a kitchen island with seating?
There are two standards. A 'counter-height' island is 90-92cm tall, matching the rest of your kitchen counters. A 'bar-height' island is taller, around 105-110cm. The choice depends on whether you prefer a seamless look or want to create a separate, elevated seating area.
How much overhang should a kitchen island have for stools?
For comfortable seating, the countertop should have a significant overhang for knee space. For a 90cm counter-height island, you need a minimum of 38-40cm of overhang. For a taller 110cm bar-height island, a slightly smaller overhang of 30-35cm is sufficient.
How do I choose the right height for my bar stools?
It's simple ergonomics. There should be a 25-30cm gap between the top of the stool's seat and the underside of the island counter. For a 90cm counter, you need 'counter stools' (around 60-67cm seat height). For a 110cm bar, you need 'bar stools' (around 75-80cm seat height).
Can I put a kitchen island in a small kitchen?
Yes, but with careful planning. A slim, mobile island or a small, fixed one can add valuable workspace. The key is to strictly adhere to clearance rules. If a fixed island makes the room feel cramped, consider a peninsula, which is attached to a wall on one side and saves walkway space.
Do I need a permit to install a kitchen island in Portugal?
For a simple island installation, a municipal permit (licença) is typically not required. However, if the project involves significant changes to the building's plumbing, electrical systems, or structural walls, you will likely need to submit a project to the local council (Câmara Municipal). At Mudelar, we handle all necessary paperwork.
What is the most durable material for a kitchen island countertop?
Engineered quartz, from brands like Silestone or Compac, is arguably the most popular choice for durability. It is non-porous, making it highly resistant to stains, scratches, and bacteria. It requires virtually no maintenance compared to natural stone like marble or granite, which needs periodic sealing.
What's the difference between a kitchen island and a peninsula?
A kitchen island is a freestanding unit accessible from all four sides. A peninsula is similar but is fixed to a wall or a run of cabinets on one end, making it accessible from three sides. Peninsulas are often a great space-saving solution for smaller kitchens where a full island would not fit.
How far apart should stools be at an island?
To ensure each person has enough elbow room, plan for a minimum of 60cm of width from the centre of one stool to the centre of the next. Also, leave about 15-20cm of space between the outermost stools and the ends of the island countertop to prevent a cramped feeling.
Conclusion
Planning a kitchen island with stools is a project where every centimetre counts. By focusing on the core principles of height, clearance, and ergonomic seating, you can create a feature that is not only a beautiful centrepiece but also the functional heart of your home. From choosing the right height to pairing it with the perfect stools and ensuring ample room to move, these details are what separate a good kitchen from a great one. Don't let your dream island become a daily frustration.
If you're ready to design a kitchen that truly works for you, our team at Mudelar is here to help. We combine years of hands-on experience with meticulous planning to deliver exceptional results. For a personal consultation and a detailed proposal for your home in Lisbon, Porto, or anywhere in between, please request a free quote today.
Ready to start your renovation?
Request a free, no-commitment quote. We reply within 24 hours.
Request a quoteLer em português: Ilha de Cozinha com Bancos 2026: Medidas e Ergonomia | Mudelar