
16 August 2026
Guest Toilet Renovation Ideas 2026: Tiny Spaces | Mudelar
Planning a guest toilet renovation? Discover our top ideas for making the most of tiny spaces, from smart fixtures to clever storage. Get a free quote from Mudelar.
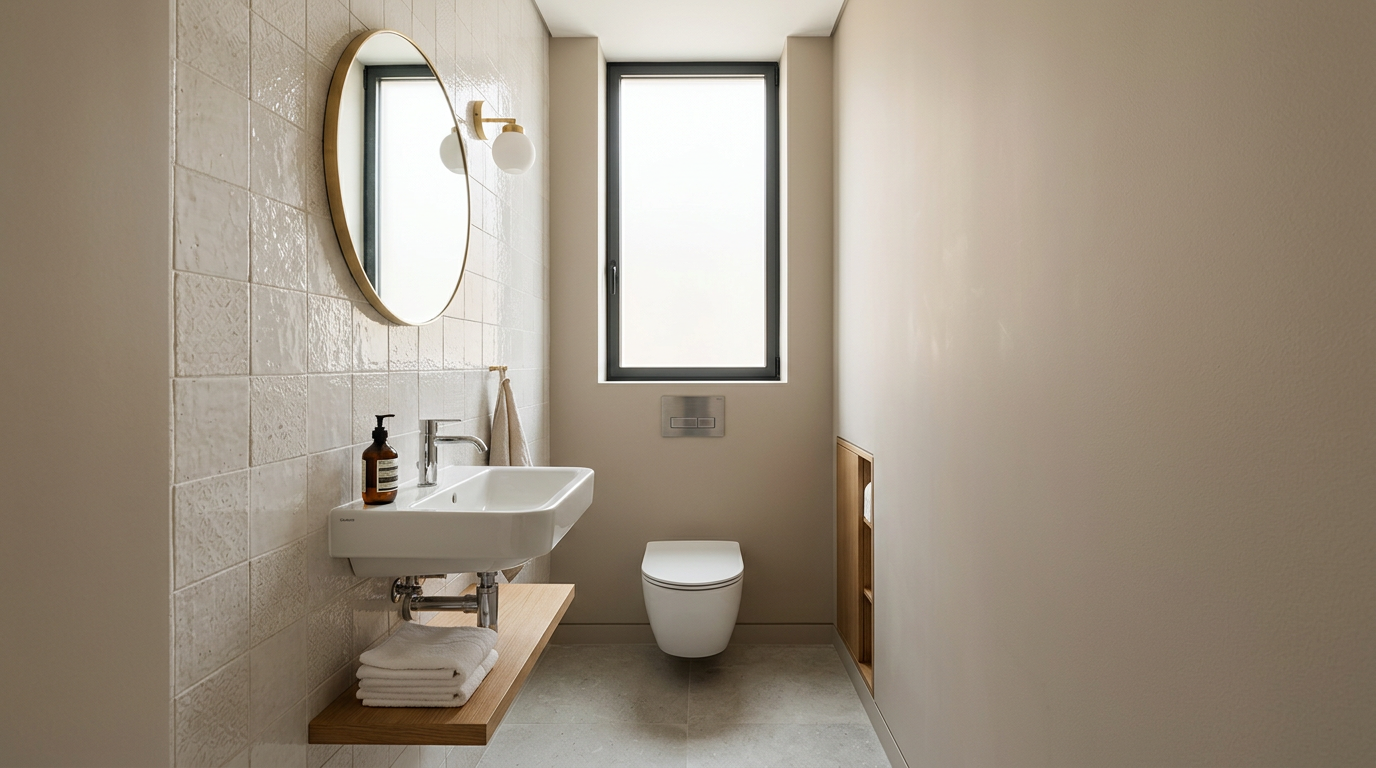
As a technical lead at Mudelar, I’ve overseen countless projects where the biggest challenge is the smallest room: the guest toilet. A successful guest toilet renovation is a masterclass in precision and clever design. Often tucked under stairs or in a converted cupboard, these spaces must be functional, comfortable, and stylish. It’s the room every guest will see, so it needs to make a great impression. This guide is my hands-on advice for transforming a cramped WC into a welcoming and surprisingly spacious-feeling room. I'll walk you through fixture selection, storage solutions, layout planning, and the visual tricks we use in Porto and Lisbon to make tiny spaces feel grand.
Quick summary
- Choose compact fixtures: Wall-hung toilets and slimline or corner basins are non-negotiable for saving precious floor space.
- Embrace vertical storage: Think tall, narrow cabinets, recessed shelving within walls, and over-the-toilet units to keep clutter at bay.
- Light is your best friend: A combination of ceiling, vanity, and even low-level LED lighting can make the room feel airy and larger.
- Use mirrors strategically: A large, well-placed mirror can visually double the size of your guest toilet and reflect light around the room.
- Opt for large-format tiles: Bigger tiles with minimal, colour-matched grout lines create a less cluttered, more seamless surface, enhancing the sense of space.
- Consider the door: A pocket or sliding door eliminates the need for door swing space, a common issue in tiny bathrooms across Portugal.
Table of contents
- Understanding the Guest Toilet Renovation Challenge
- Planning Your Small Guest Toilet Layout
- Essential Fixtures for Compact Spaces
- Maximising Storage in a Tiny Guest Toilet
- Creating the Illusion of Space with Light and Colour
- Tiling and Flooring: The Foundation of Your Design
- The Renovation Process: A Step-by-Step Guide
Understanding the Guest Toilet Renovation Challenge
The guest toilet, or 'cloakroom' as it's often called, presents a unique set of design and construction challenges. Typically, these are the smallest rooms in a Portuguese home, often measuring just 1m x 2m or even less. The primary goal of a guest toilet renovation is to balance aesthetics, functionality, and the feeling of space within these tight constraints. It's not just about updating fixtures; it's about re-imagining the entire room to work smarter.
In our projects in cities like Braga and Aveiro, we frequently encounter guest WCs with awkward layouts, poor lighting, and virtually no storage. These issues make the room feel claustrophobic and impractical. A well-executed renovation addresses these problems head-on. The challenge is technical: plumbing and electrical work must be perfectly planned, as there's no room for error. It’s also a design challenge: every single element, from the tile size to the tap finish, must be chosen to contribute to an overall feeling of quality and spaciousness.
A great guest toilet is a sign of a thoughtful host. It should be an effortless, pleasant experience for visitors. This means ensuring easy access, intuitive use of fixtures, and a clean, uncluttered environment. It adds tangible value to your home and significantly improves daily life if it's the main downstairs toilet. Therefore, planning and professional execution are paramount to turn this tiny space into a standout feature of your home.
Planning Your Small Guest Toilet Layout
Layout is everything in a small space. Before you even think about tile colours or tap styles, the placement of the toilet and sink must be optimised. The goal of a guest toilet renovation layout plan is to maximise clear floor space and create an intuitive flow. You must ensure there's comfortable clearance around each fixture and that the door can open fully without hitting anything. A poorly planned layout can render the room almost unusable, no matter how beautiful the materials are.
Start by drawing a to-scale floor plan. Mark the existing soil pipe (for the toilet) and water inlet locations. While these can be moved, it adds complexity and requires more extensive work. In many older apartments in Lisbon or Porto, moving the soil stack is particularly difficult. Your layout should prioritise a clear path from the door and enough 'elbow room' at the basin. We generally recommend a minimum of 60cm of clear space in front of the toilet and sink for comfortable use.
The 'Golden Triangle' in a WC
Unlike a full bathroom, the 'triangle' in a guest toilet is simpler: the door, the toilet, and the sink. The relationship between these three points defines the room's usability. Ideally, the toilet should not be the first thing you see when you open the door. If possible, place the sink opposite the door or on an adjacent wall to create a more pleasing initial view. The toilet can then be positioned on the side wall, which often feels more discreet and private.
Measuring and Space Optimisation
Precision is your ally. Measure everything: the room's length, width, and height, plus the door's width and swing direction. Standard clearance rules are a good starting point, but in very tight spaces, we have to be creative. For instance, a wall-hung toilet can save you up to 20cm of floor depth compared to a standard close-coupled model. A corner sink can utilise a space that would otherwise be wasted. Every centimetre counts, and meticulous planning prevents costly on-site changes.
Essential Fixtures for Compact Spaces
Choosing the right fixtures is the most critical decision in a small guest toilet renovation. Bulky, standard-sized items will overwhelm the room. The market now offers an excellent range of 'compact' or 'cloakroom' fixtures specifically designed for these situations. Brands like Roca, Sanindusa, and Grohe have extensive collections that don't compromise on style or quality, even at a smaller scale. The key is to select pieces that are visually light and physically occupy less volume.
Your focus should be on two main items: the toilet and the basin. These are the functional anchors of the room. Wall-mounted options for both are often the best solution, as they free up the floor. This creates an unbroken floor surface, which is a powerful psychological trick that makes the room feel significantly larger and, as a practical bonus, makes it much easier to clean. When selecting taps, consider wall-mounted versions to save precious counter space on a small vanity unit.
Wall-Hung vs. Floor-Mounted Toilets
A wall-hung toilet is the ultimate space-saver. The cistern is concealed within a stud wall (which we typically build to be 15-20cm deep), and the bowl 'floats' above the floor. This not only saves physical space but also creates a clean, modern aesthetic. A back-to-wall toilet, where the pan sits on the floor but the cistern is still concealed, is another good option that offers a similar clean look but with less visual impact than a full wall-hung model. A standard close-coupled toilet is often too deep for very narrow guest WCs.
Choosing the Right Basin
For the basin, think slim and smart. A 'slimline' vanity unit with an integrated basin offers storage and a wash space in a depth of as little as 25-30cm. Corner basins are fantastic for utilising awkward corners that would otherwise be dead space. Alternatively, a small countertop basin on a floating shelf made of Silestone or Compac quartz provides a minimalist, high-end look without the bulk of a full cabinet. Avoid pedestal sinks, as the pedestal visually clutters the floor space.
Taps and Faucets: Wall-Mounted vs. Deck-Mounted
If you choose a very narrow basin or a small countertop bowl, a standard deck-mounted tap can feel cramped. Wall-mounted taps are a sleek, practical alternative. They are installed on the wall behind the basin, freeing up the entire surface of the vanity or shelf. This requires careful planning during the plumbing phase but results in a very clean, uncluttered look. Single-lever monobloc taps are generally preferable to separate hot and cold taps to save space.
Maximising Storage in a Tiny Guest Toilet
Lack of storage is the number one complaint I hear about guest toilets. A spare toilet roll on the floor or a bottle of hand soap on the cistern instantly makes the room look messy. Clever storage is essential for maintaining a clean, hotel-like feel. In a guest toilet renovation, storage must be integrated seamlessly into the design, often using vertical space or hidden nooks that don't impinge on the limited floor area.
The key is to think vertically and within the walls. Standard freestanding cabinets are usually out of the question. Instead, we look for opportunities to build storage into the fabric of the room. This could be a tall, narrow cabinet that reaches the ceiling or shelving recessed into a stud wall. A well-designed vanity unit, even a small one, is also a must-have for hiding cleaning supplies and spare toiletries out of sight.
Vertical and Recessed Shelving
Take advantage of the room's height. A tall, shallow cabinet can store a surprising amount without eating into the floor plan. Even better is recessed shelving. The stud wall used to conceal a wall-hung toilet's cistern is a perfect opportunity. We can build niches into this wall, either next to or above the toilet, to create display or storage space that has zero footprint. Adding integrated LED lighting to these niches creates a high-end, custom feature.
Vanity Units: Floating vs. Freestanding
A floating vanity unit, mounted to the wall with clear space underneath, is the best choice for a small guest toilet. Like a wall-hung toilet, it keeps the floor clear and enhances the feeling of spaciousness. Even a very shallow floating unit made from moisture-resistant MDF can house a small sink and provide crucial cupboard space below for toilet paper and a bottle of cleaner. Choose models from brands like Egger or Kronospan for durable and stylish finishes.
Hidden Storage Solutions
Mirrored cabinets are a classic for a reason: they provide storage and a mirror in one. Choose a recessed model that sits flush with the wall for the cleanest look. Another clever solution is to build a storage column into the corner of the room or utilise the space over the door with a high shelf for storing bulk items like paper towels. Every centimetre can be put to work with careful planning and custom joinery.
Creating the Illusion of Space with Light and Colour
Once the layout and fixtures are sorted, you can use design elements to manipulate the perception of space. This is where the magic happens. The right combination of colour, light, and reflective surfaces can make the smallest guest toilet in Sintra feel open and inviting. The common mistake is to think a small room needs small features; often, the opposite is true. A few bold, simple choices are more effective than lots of fussy little details.
The foundation of this illusion is a light and cohesive colour palette. Dark colours absorb light and can make walls feel like they are closing in. While a dark, dramatic 'jewel-box' guest toilet can be a bold style statement, it's a difficult look to get right without excellent lighting. For most projects, a lighter scheme is a safer and more effective bet for creating a sense of space.
The Power of a Light Colour Palette
Whites, off-whites, soft greys, and pale pastels are your best friends. They reflect light and make the room feel brighter and more airy. To prevent it from feeling sterile, use different textures within the same colour family. For example, you could have glossy white tiles, a matte white wall, and a light wood-effect vanity. Painting the ceiling the same colour as the walls (or even a shade lighter) can blur the lines and make the room feel taller.
Strategic Lighting Placement
One central ceiling light is not enough. It casts shadows and can make the room feel gloomy. A layered lighting plan is essential. This should include:
- Ambient Light: A flush-mount ceiling fixture or a series of recessed spotlights.
- Task Light: Sconces on either side of the mirror or a backlit mirror provide clear, shadow-free light for the face.
- Accent Light: Low-level LEDs along the floor or in a recessed shelf add a touch of drama and work well as a night light.
Using Mirrors to Enlarge the Room
A large mirror is the most effective tool for visually expanding a small space. Don't be afraid to go big. A mirror that covers the entire wall behind the sink can dramatically enhance the sense of depth and reflect light throughout the room. Consider a simple, frameless design to maximise the reflective surface and maintain a clean, modern look. The effect is transformative and is a standard part of any guest toilet renovation we undertake.
Tiling and Flooring: The Foundation of Your Design
The surfaces you choose for your walls and floors have a huge impact on both the style and the perceived size of your guest toilet. The conventional wisdom used to be 'small room, small tiles', but as a professional, I can tell you this is often incorrect. Fewer grout lines create a more serene and less 'busy' surface, which helps the space feel larger. Durability and ease of cleaning are also key considerations.
For flooring, you need something that is waterproof, slip-resistant, and hard-wearing. Rectified porcelain tile is an excellent choice for both floors and walls. Because the edges are cut perfectly straight, they can be laid with very narrow grout lines (1-2mm), creating an almost seamless appearance. This is particularly effective when using large-format tiles. Whatever you choose, continuity is key. Using the same tile on the floor and up one or more walls can create a cohesive look that blurs the boundaries of the room.
Large-Format vs. Small Tiles
For a small guest toilet, I almost always recommend large-format tiles (e.g., 60x60cm, 60x120cm). With fewer grout lines to break up the surface, the walls and floor appear more expansive and continuous. This creates a calm, uncluttered backdrop. If you love the look of smaller tiles, like mosaics, consider using them as a feature in a small area, such as the splashback behind the sink or inside a recessed shelf, rather than on all four walls.
Choosing a Durable and Stylish Floor
Porcelain tile is the top contender for flooring due to its robustness and water resistance. It comes in countless styles, including convincing wood, stone, and concrete effects. This allows you to get the aesthetic of a material like wood without the maintenance concerns in a wet area. Another excellent option for flooring is luxury vinyl tile (LVT), which is warm underfoot and completely waterproof. Laminate flooring, even water-resistant types like AC5 laminate, should be used with caution in any bathroom space.
The Renovation Process: A Step-by-Step Guide
Request a free, no-commitment quote. We reply within 24 hours.
Request a quote →A professional guest toilet renovation follows a precise sequence to ensure efficiency and a high-quality finish. It's more than just cosmetic changes; it involves plumbing, electrical, and construction work that must be perfectly coordinated. A typical project timeline, once all materials are on-site, is around 7-10 working days.
- Protection and Demolition (Day 1): We begin by protecting all surrounding areas, including floors and furniture. Then, the old fixtures, tiles, and any non-essential walls or boxing are carefully removed and disposed of.
- First Fix Plumbing and Electrical (Days 2-3): This is the crucial stage where our certified plumbers and electricians reposition pipes and wires for the new layout. This includes installing the in-wall frame for a wall-hung toilet, moving the basin waste pipe, and running cables for new lighting.
- Making Good and Preparation (Days 4-5): The walls and floor are prepared. This involves plasterboarding over new frames, chasing wires into walls, and applying a waterproof membrane ('tanking') in key areas. A level surface is essential for a perfect tile finish.
- Tiling (Days 6-7): Our expert tilers lay the floor and wall tiles. This is a meticulous process, especially with large-format or patterned tiles, that requires precision cutting and levelling.
- Grouting and Second Fix (Day 8): After the tile adhesive has cured, the tiles are grouted and sealed. The electrician and plumber then return for the 'second fix' – installing the toilet, basin, taps, lights, and extractor fan.
- Finishing Touches (Days 9-10): The final step involves fitting the mirror, toilet roll holder, towel hook, and any custom joinery. The room is then professionally cleaned, and a final quality inspection is carried out with you. With a company like Mudelar, you have a single point of contact managing this entire process.
Recommended materials and options
| Type | Features | When to choose |
|---|---|---|
| Wall-Hung Toilet | Concealed cistern, bowl floats above the floor. Saves up to 20cm of depth. Easy to clean underneath. | When maximising floor space is the absolute top priority and you want a modern, minimalist aesthetic. |
| Slimline Vanity | A shallow cabinet with an integrated basin, often only 25-35cm deep. Made from moisture-resistant materials. | To combine a basin with essential, hidden storage without protruding too far into the room. |
| Rectified Porcelain | Tiles with mechanically finished edges, allowing for very thin grout lines (1-2mm). | For creating a seamless, expansive look on floors and walls, making the room feel larger and less busy. |
| LED Backlit Mirror | A mirror with integrated lighting around its edges or from behind. Provides even, shadow-free task light. | To combine task lighting and a mirror in one fixture, saving wall space and creating a sophisticated look. |
| Pocket Door | A door that slides into a cavity built into the adjacent wall, disappearing when open. | When a traditional swing door would hit a fixture or block a walkway. Essential for very tight layouts. |
| Engineered Quartz | A durable, non-porous composite material (e.g., Silestone) for countertops or shelves. | For a high-end, durable surface for a floating shelf or countertop basin that resists stains and water. |
Quick comparison
| Feature | Wall-Hung Toilet | Back-to-Wall Toilet | Close-Coupled Toilet |
|---|---|---|---|
| Space Usage | Excellent. The most space-efficient option. | Good. Saves some space as the cistern is concealed. | Standard. The deepest profile, least suitable for tiny WCs. |
| Aesthetics | Modern, minimalist, clean. Creates a feeling of spaciousness. | Clean and tidy, more traditional than a wall-hung model. | Traditional and most common. Can look bulky. |
| Cleaning | Easiest. The floor is completely clear underneath the bowl. | Easy. No cistern to clean around, just the pan base. | More difficult. Requires cleaning around the pan and cistern. |
| Installation Complexity | High. Requires a support frame and a stud wall to be built. | Medium. Requires a concealed cistern or furniture unit. | Low. The simplest to install, a self-contained unit. |
Common mistakes to avoid
- Choosing oversized fixtures. A standard-sized toilet or a deep vanity unit will dominate a small room. Always check the dimensions and opt for 'compact' or 'cloakroom' ranges.
- Forgetting about ventilation. Guest toilets, especially those without windows, can become damp and stuffy. A quiet, efficient extractor fan is not a luxury; it's a necessity for air quality and preventing mould.
- Using a single, harsh light source. A lone ceiling light creates shadows and a clinical feel. A layered lighting scheme with a dimmer switch is crucial for creating a warm, welcoming atmosphere.
- Ignoring the door swing. It's a classic error. You install a beautiful new sink, only to find the door can't open fully. Always factor the door's arc into your layout plan and consider a pocket or sliding door if necessary.
- Over-accessorising. In a small space, less is more. Avoid cluttering surfaces with decorative objects. A beautiful soap dispenser, a quality hand towel, and perhaps a single small plant are all you need.
- Using too many patterns or colours. A busy floor tile, a patterned wallpaper, and colourful towels will create visual chaos. Stick to a simple, cohesive palette and use texture, not pattern, to add interest.
- Skimping on professional installation. The tight tolerances in a guest toilet leave no room for error. Incorrect plumbing or bad tiling will be immediately obvious and costly to fix. A professional ensures it's done right the first time.
Pre-project checklist
- Measure your room's exact dimensions: length, width, and height.
- Create a simple sketch of your desired layout, noting the position of the door and any windows.
- Decide on the style you want: modern, classic, minimalist, etc. Create a mood board with inspiration images.
- List the essential fixtures you need: toilet type, basin style, tap.
- Plan your lighting: where will the ambient, task, and accent lights go?
- Choose your core materials: floor and wall tiles, paint colour.
- Assess your storage needs: what do you need to store, and where can it go?
- Check your ventilation: do you have a window or need a new extractor fan?
- Consider the door: is the current one practical, or do you need a space-saving alternative?
- Contact a reputable renovation company for a detailed consultation and quote.
How Mudelar handles it
At Mudelar, we specialise in taking the stress out of projects like a guest toilet renovation. Our turnkey service means we manage every single detail from the initial design concept to the final handover. We begin with an in-depth on-site visit to your home in the Lisbon, Porto, or Setúbal areas to understand your vision and the technical constraints of the space. Our architects and designers then create a detailed 3D plan and a fixed-price proposal, so you know exactly what to expect.
Once you approve the plan, a dedicated project manager coordinates our in-house team of certified plumbers, electricians, tilers, and builders. We handle all material procurement, deliveries, and quality control, ensuring a seamless process and a flawless finish. Our focus is on clear communication and meticulous execution, transforming your small space with minimal disruption to your life. To explore how we can help, take a look at our services or simply request a free quote to get started. You can learn more about us and our commitment to quality.
Frequently asked questions (FAQ)
How long does a guest toilet renovation take?
For a standard guest toilet renovation involving new tiles, fixtures, and lighting, the on-site work typically takes between 7 and 10 working days. This assumes all materials have been selected and are available. The timeline can be longer if significant structural changes, like moving a soil pipe or installing a pocket door, are required. We provide a detailed project schedule before any work begins.
Do I need a permit to renovate a small toilet in Portugal?
For most internal guest toilet renovations that don't alter the building's exterior, structure, or plumbing stacks, a formal building license ('Licença de Obras') is not required. The work usually falls under a 'Comunicação Prévia'. However, if you live in a protected building or the work involves changing main plumbing lines, some form of notification to the local council (Câmara Municipal) may be needed. We handle all necessary paperwork as part of our service.
Is it worth renovating a guest toilet?
Absolutely. A modern, clean, and well-designed guest toilet significantly enhances the comfort of your guests and adds to your home's overall appeal and value. It’s a small project that makes a big impact on daily life and is often a strong selling point for potential buyers. Given its small size, it's also a more manageable project to undertake than a full family bathroom renovation.
What's the difference between a wall-hung and a back-to-wall toilet?
A wall-hung toilet has the bowl mounted directly to the wall, 'floating' above the floor. Its cistern and support frame are hidden inside the wall. A back-to-wall toilet has the bowl sitting on the floor, but it's flush against the wall or a furniture unit, which conceals the cistern. Both save space compared to a standard toilet, but the wall-hung version offers the greatest space-saving benefit and makes cleaning the floor easiest.
How do you make a tiny guest toilet look bigger?
Use a light colour palette, install a large mirror, and ensure good, layered lighting. Choose space-saving fixtures like a wall-hung toilet and a slimline vanity. Laying large-format tiles with thin grout lines on the floor and walls will also create a less cluttered, more expansive feel. Keeping the floor area as clear as possible is the most effective visual trick.
What are the best tiles for a small bathroom?
Large-format rectified porcelain tiles (e.g., 60x60cm or larger) are an excellent choice. The large size and minimal grout lines create a seamless, uncluttered look that makes the space feel bigger. For a touch of detail, you can use smaller mosaic or patterned tiles as a feature in a contained area, like a splashback, while keeping the main surfaces simple.
Should a guest toilet have a window?
A window is always a bonus for natural light and ventilation. However, many guest toilets, particularly in apartments in areas like downtown Porto or Lisbon, do not have one. If there's no window, it is absolutely essential to install a high-quality, quiet mechanical extractor fan to manage moisture and odours effectively. Good artificial lighting is also critical to compensate for the lack of natural light.
What is the best colour to paint a small guest toilet?
Light, neutral colours are the safest and most effective choice for making a small space feel larger. Brilliant white, soft off-whites, very light greys, or pale blues and greens work very well. They reflect light and create an airy, open feeling. Painting the trim and ceiling the same colour as the walls can further enhance this effect by blurring the room's edges.
Conclusion
A successful guest toilet renovation is a testament to the power of smart design. It’s not about the size of the space, but how you use it. By selecting compact fixtures, maximising storage, and employing clever visual strategies with light and colour, even the tiniest cloakroom can be transformed into a stylish and highly functional asset to your home. Careful planning is the key to unlocking this potential, ensuring every centimetre is put to good use.
If you're ready to turn your cramped guest WC into a space you're proud of, our team at Mudelar is here to help. We have the technical expertise and design vision to manage your project from start to finish. Request a free quote today, and let's discuss how we can create a beautiful and practical guest toilet for your home in Portugal.
Ready to start your renovation?
Request a free, no-commitment quote. We reply within 24 hours.
Request a quoteLer em português: Casas de banho de serviço 2026: 8 dicas para espaços mínimos | Mudelar