
17 July 2026
Kitchen Island with Stools: 2026 Sizing Guide | Mudelar
Planning a kitchen island with stools? Our expert 2026 guide covers sizing, clearance, and ergonomics for your perfect breakfast bar in Porto. Get a free quote!
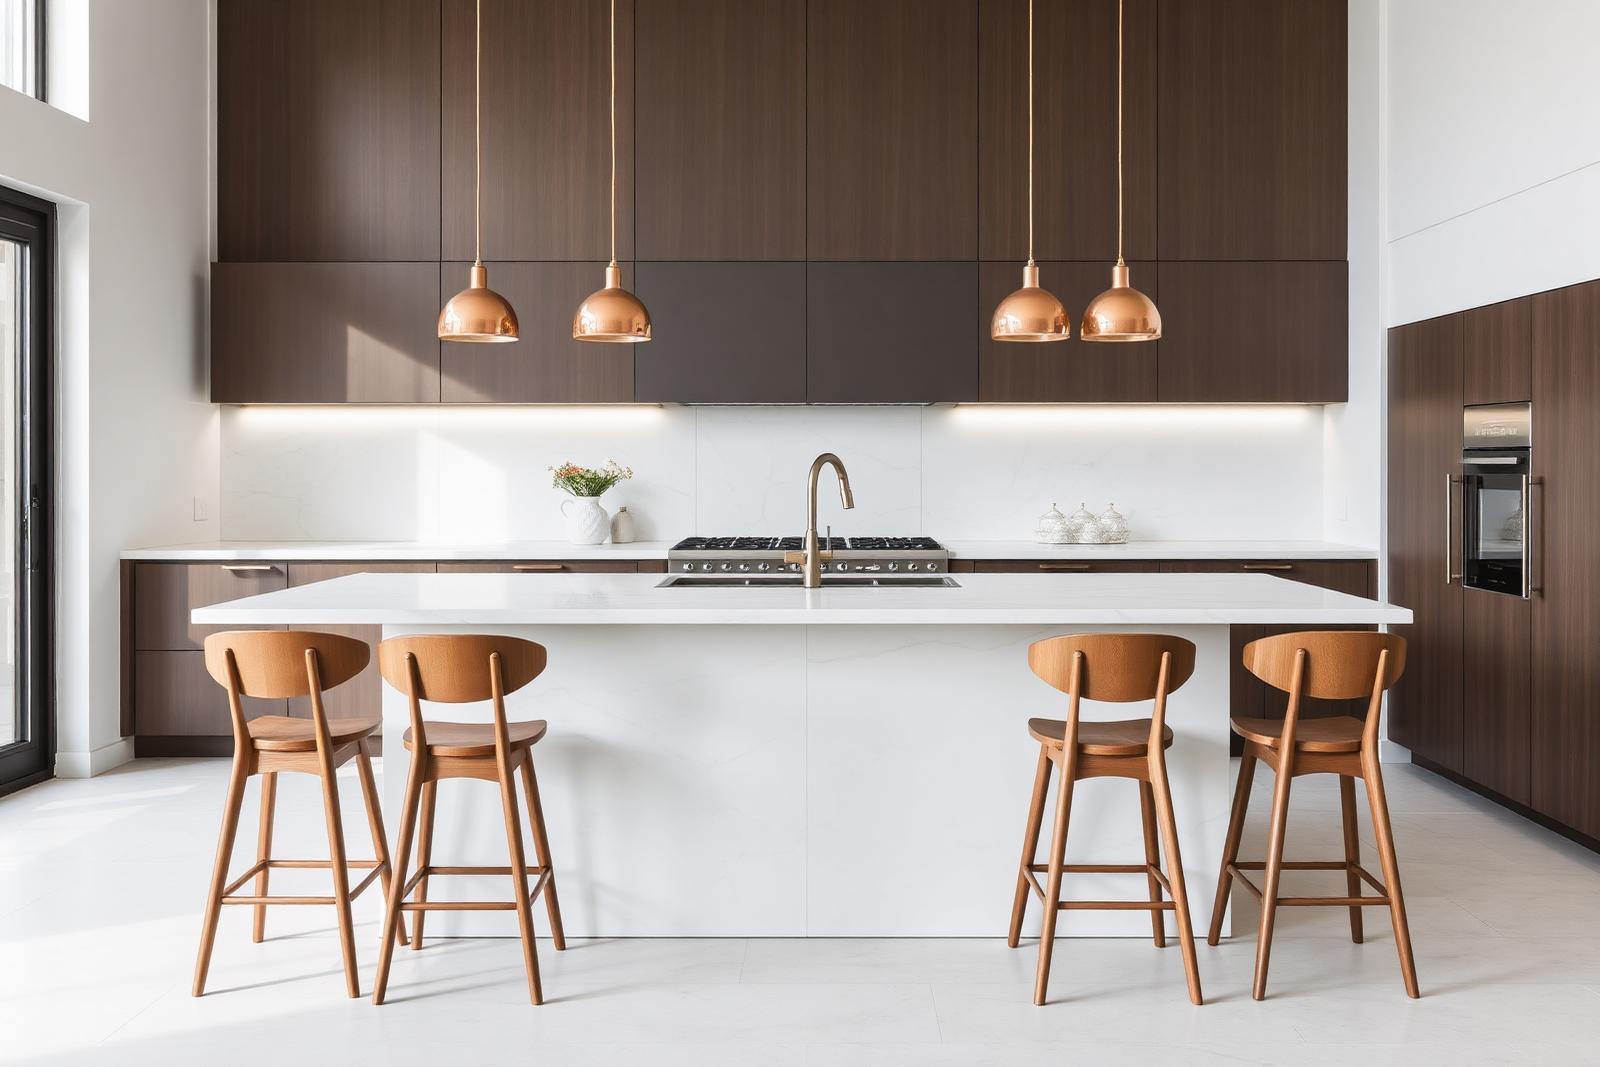
As a technical lead for Mudelar, I’ve overseen countless kitchen renovations across Portugal, from vibrant Lisbon apartments to family homes in Braga. A kitchen island with stools is consistently one of the most requested features, and for good reason. It transforms a kitchen from a purely functional space into the social heart of the home. However, its success hinges entirely on correct sizing and ergonomics. An island that is too large can cripple workflow, while poorly chosen stools create discomfort. In this guide, I will share my hands-on experience, detailing the precise measurements, clearances, and design considerations needed to create a beautiful and highly functional kitchen island that perfectly suits your space and lifestyle.
Quick summary
- Standard Counter Height: Aim for a finished island height of 90-92 cm to match your main counters, which is ideal for food prep and comfortable seating with counter-height stools.
- Essential Clearance: You must leave a minimum of 100 cm of clear space around the island, increasing to 120 cm for high-traffic zones or areas with opposing appliances.
- Seating Ergonomics: Allow 60 cm of width per person for comfortable seating. The overhang for legroom should be at least 30-38 cm for counter-height islands.
- Stool Selection is Key: Choose stools that allow for 25-30 cm of space between the top of the seat and the underside of the counter for optimal comfort.
- Functionality First: Decide the island's primary purpose—be it for dining, prep, or housing a sink or hob—as this will dictate its final size and layout.
- Lighting and Power: Plan for integrated electrical outlets and dedicated task or ambient lighting, such as pendant lights, from the very beginning.
Table of contents
- The Role of a Kitchen Island with Stools
- Critical Dimensions: Getting the Size and Clearance Right
- Ergonomics of Seating: Counter vs. Bar Height Stools
- Material Choices for Your Island and Worktop
- Integrating Functionality: Sinks, Hobs, and Storage
- Lighting and Electricals for Your Kitchen Island
- Common Mistakes to Avoid
- Pre-project checklist
- How Mudelar Handles It
- Frequently asked questions (FAQ)
- Conclusion
The Role of a Kitchen Island with Stools in a Modern Home
A kitchen island with stools serves a dual purpose: it's a practical workspace and a social hub. In many of the homes we renovate in Porto and Aveiro, the open-plan living concept has erased the formal dining room, making the kitchen island the new centre for casual meals, morning coffees, and evening chats. It’s where children do their homework while you prepare dinner and where guests gather with a drink. This functional shift requires thoughtful design that balances aesthetics with practicality.
Beyond socialising, a well-designed island dramatically improves kitchen workflow. It provides much-needed additional counter space for food preparation, a landing zone for groceries, or a surface for serving buffet-style. When properly integrated into the kitchen’s work triangle (the path between sink, hob, and refrigerator), an island can make the entire space more efficient and logical to use. It’s not just a piece of furniture; it’s a core component of your kitchen’s operational layout and social dynamic.
Defining the Island's Primary Function
Before any drawing or material selection, the first question I ask clients is: what is the primary role of your island? Will it be mainly a breakfast bar for quick meals? If so, the focus is on comfortable seating and sufficient legroom. Or is its main purpose to be a culinary workhorse, perhaps housing a second sink or a hob? This choice has major implications for size, material durability, and the need for services like plumbing and ventilation.
Enhancing Storage and aestic appeal
An often-overlooked benefit of a kitchen island is the vast storage potential it unlocks. We can incorporate deep drawers for pots and pans, customised cabinets for small appliances, open shelving for cookbooks, or even a built-in wine fridge. The design of the island, from its panel style to its worktop material, also provides a fantastic opportunity to create a focal point in the kitchen. Using a contrasting colour or material for the island can add depth and character to the overall design scheme, a technique we often use in our projects in the Setúbal region.
Critical Dimensions: Getting the Size and Clearance Right
Getting the dimensions wrong is the most common mistake I see. A beautiful island that blocks movement is a daily frustration. The key is to balance the size of the island itself with the clearance zones around it. In Portugal, we work with metric measurements, and precision is everything. An island must feel integrated, not shoehorned into a space. It should enhance the flow of the room, not obstruct it.
The ideal dimensions for a kitchen island are not one-size-fits-all; they are dictated by the size of your kitchen. A good starting point for a functional island is a minimum depth of 60 cm for cabinets, plus a 30-40 cm overhang for seating, resulting in a total depth of 90-100 cm. The length can vary, but you should allow a minimum of 60 cm of width per stool to avoid diners feeling cramped.
The 100/120 cm Clearance Rule
Clearance is non-negotiable. As a standard rule, we always design for a minimum of 100 cm of open floor space on all sides of the island. This allows for one person to work or walk comfortably. In higher traffic areas—for instance, the main walkway through the kitchen or between the island and the refrigerator—we always increase this to 120 cm. This extra space allows two people to pass by each other and provides enough room to safely open appliance doors (like an oven or dishwasher) without blocking the path.
Height Considerations: Matching Your Counters
The most common and practical height for a kitchen island is the same as the standard kitchen counter height, which is typically 90-92 cm from the floor to the top of the worktop. This creates a seamless, uniform look and allows the island to be used as an extension of your primary workspace for tasks like chopping and food prep. This height pairs perfectly with standard counter-height stools, which are widely available and generally offer the most comfortable and ergonomic seating position for dining at an island.
Ergonomics of Seating: Counter vs. Bar Height Stools
Choosing between counter-height and bar-height seating for your kitchen island with stools is a crucial decision that impacts comfort, aesthetics, and usability. The choice dictates the overall height of your island's seating area. As mentioned, a standard counter-height island (90-92 cm) is the most popular choice in our renovations from Lisbon to Porto because of its ergonomic advantages and cohesive look. It keeps everyone at a similar level, whether they are cooking or sitting.
For a counter-height island, you should look for stools with a seat height of approximately 60-65 cm. This creates a gap of 25-30 cm between the seat and the underside of the worktop, which is the sweet spot for comfortable legroom. It allows for easy movement and prevents your knees from hitting the counter. Ensure there is also a clear overhang of at least 30 cm, ideally 38 cm, for your knees to tuck under comfortably.
When to Consider Bar Height
Bar-height islands, typically 105-110 cm tall, create a more distinct, bistro-like feel. This can be a great design choice if you want to visually separate the dining area from the prep area, often achieved with a split-level island. The taller bar-height stools (seat height of 75-80 cm) can feel more formal and are well-suited for entertaining. However, I find they can be less comfortable for longer periods and may not be as accessible for children or older family members. They also create a visual barrier in the kitchen, which might contradict an open-plan feel.
Legroom and Spacing Per Person
Regardless of height, spacing is critical for comfort. The industry standard is to allow 60 cm of width for each seating spot. This provides enough elbow room for each person to eat without feeling crowded. If your island has curved seating or is at a corner, you might need to allow a bit more. I always map this out with clients on the floor plan to visualise the space. Skimping on this width is a recipe for an awkward and underused seating area, turning your beautiful island into a glorified shelf.
Recommended materials and options
Choosing the right materials for your kitchen island is about balancing durability, maintenance, and aesthetics. Here are some of the options we frequently recommend in our Mudelar projects.
| Type | Features | When to choose |
|---|---|---|
| Engineered Quartz | Brands like Silestone or Compac offer non-porous, scratch-resistant, and stain-resistant surfaces. Huge colour variety. | For a highly durable, low-maintenance worktop in a busy family kitchen. Ideal if housing a sink. |
| Laminate | Modern laminates (e.g., from Egger or Kronospan) offer realistic wood/stone looks. Highly resistant to impact and abrasion. | For a versatile and resilient surface on a specific budget, with a wide array of design possibilities. |
| HPL Plywood | High-Pressure Laminate bonded to quality plywood. Exposes a beautiful, layered edge detail. Extremely robust. | For a contemporary, Scandinavian or industrial aesthetic that celebrates raw materials and offers high durability. |
| Natural Stone | Materials like marble or granite offer unique, one-of-a-kind veining and natural beauty. Granite is very durable. | When you want a luxurious, statement piece. Marble requires more care; granite is better for heavy-use areas. |
| Solid Wood | Provides natural warmth and a classic aesthetic. Can be sanded and refinished over time to remove any marks. | For a traditional, rustic, or farmhouse-style kitchen. It requires regular oiling to maintain its condition. |
| Moisture-Resistant MDF | Used for the island's base structure. Provides a stable, smooth base for painting or lacquering in any colour. | As the standard structural material for the island carcass, offering design flexibility and stability. |
Quick comparison: Seating Height Options
Understanding the different seating heights helps you make the right choice for your lifestyle.
| Seating Option | Typical Surface Height | Typical Seat Height | Pros | Cons |
|---|---|---|---|---|
| Counter Height | 90-92 cm | 60-65 cm | Ergonomic for prep & dining, seamless look, accessible for most people. | Less formal, can feel too integrated with the prep space for some. |
| Bar Height | 105-110 cm | 75-80 cm | Creates a distinct dining zone, good for entertaining, bistro feel. | Less comfortable for long periods, less accessible, can act as a visual barrier. |
| Table Height | 75 cm | 45 cm | Most comfortable for dining, uses standard dining chairs. | Requires a split-level island, not ergonomic for food prep. |
Material Choices for Your Island and Worktop
Request a free, no-commitment quote. We reply within 24 hours.
Request a quote →Selecting materials for your island involves more than just the worktop. The base structure, or carcass, is equally important for longevity. At Mudelar, we typically construct our island bases from moisture-resistant MDF. This material is incredibly stable, doesn't warp with temperature changes, and provides a perfect, smooth surface for lacquering in the precise colour of your choice. It gives us the flexibility to create any style, from sleek modern panels to classic shaker doors.
The worktop is where durability meets design. For most projects in high-use kitchens, especially in rental properties or family homes in areas like Cascais or Sintra, I strongly recommend engineered quartz. Brands like Silestone and Compac offer an unparalleled combination of durability and beauty. Being non-porous, they are resistant to staining from wine, coffee, or olive oil. They are also highly scratch-resistant, making them a worry-free choice for a functional kitchen island.
Exploring Natural and Alternative Options
While quartz is a fantastic all-rounder, some clients prefer the unique character of natural materials. Granite remains an excellent choice for durability, offering robust performance with a natural stone look. Marble is undeniably beautiful but is softer and more porous, making it prone to staining and scratching. It's a choice for those who appreciate the patina that develops over time and are prepared for more careful maintenance. For a warmer, more traditional feel, a solid wood worktop like oak or walnut can be stunning, but it requires regular oiling to protect it from water damage.
Cohesion with Flooring and Cabinetry
Your island doesn't exist in isolation. Its materials must complement the other finishes in your kitchen. For instance, if you have beautiful rectified porcelain tile flooring, you might choose a worktop with subtle veining that picks up on the floor's tones. We often contrast the island cabinet colour with the main perimeter cabinets to make it a statement piece. For example, a dark blue island can look stunning against light grey wall cabinets. It’s all about creating a balanced and harmonious palette.
Integrating Functionality: Sinks, Hobs, and Storage
A modern kitchen island can be much more than just a surface and seating. Its true potential is unlocked when you integrate key functionalities. However, adding appliances like a sink or a hob to your kitchen island with stools requires careful planning. An island sink is great as a secondary prep sink or even as the main one, especially if the island faces a window or the living area, allowing you to engage with family or guests while cleaning up. Faucets from brands like Grohe offer stylish and reliable options.
If you plan to install a hob on the island, you must consider ventilation. A ceiling-mounted extractor hood can be visually imposing. A more streamlined solution is a downdraft extractor, which rises from the worktop when in use and sits flush when off. This maintains clean sightlines but requires sufficient depth in the island cabinet for the mechanism. You also need to plan for electrical or gas lines to be routed through the floor, a detail we plan for at the earliest stage of our renovation projects.
Maximising Storage Solutions
Storage is the island’s secret weapon. We design islands with a combination of deep drawers and cupboards to house everything from heavy pots and pans to small appliances, freeing up your main cabinets. Drawers are often more ergonomic than cupboards for lower storage, as they allow you to see and access everything without bending down and reaching into the back. We can even integrate specialised features like pull-out bins for recycling, vertical dividers for baking trays, or a custom wine rack.
The Importance of the Work Triangle
When adding a sink or hob to the island, you must reassess the kitchen's work triangle. The path between the sink, hob, and refrigerator should be unobstructed and efficient. Placing the hob on the island and the sink on the perimeter wall can work well, but you need to ensure there’s adequate landing space on either side of both appliances. We use 3D modeling to simulate these workflows with our clients, ensuring the final layout is as practical as it is beautiful.
Lighting and Electricals for Your Kitchen Island
Proper lighting and power are critical for a functional kitchen island. They are not afterthoughts; they must be planned from the outset, as wiring needs to be run under the floor or through the ceiling before finishes are applied. Your lighting plan should include multiple layers: task lighting for food prep, and ambient lighting for dining and socialising. Poor lighting over an island can render it almost useless for anything other than storage.
For task lighting, a row of two or three pendant lights is the most popular and effective solution. They provide direct, focused light onto the worktop. The bottom of the pendants should hang approximately 75-90 cm above the counter to provide illumination without obstructing views across the room. A dimmer switch is essential, allowing you to adjust the intensity from bright for chopping to soft for a relaxed dinner. Recessed downlights in the ceiling can supplement this, ensuring the entire area is well-lit.
Integrating Power and Charging
In today's connected world, a kitchen island with stools needs readily accessible power. We incorporate electrical outlets directly into the island itself. They can be placed discreetly on the side panels or, for a cleaner look, we can use pop-up outlets that sit flush with the worktop and rise up when needed. These are perfect for plugging in small appliances like a blender or charging a laptop or phone while you sit at the counter. We always recommend including at least one outlet with USB ports for added convenience.
Common mistakes to avoid
Over the years, our team at Mudelar has been called in to fix many kitchen island issues. Here are the most common mistakes I see people make, which you can easily avoid with proper planning.
- Ignoring Clearance. This is the number one error. Squeezing in an island that is too large for the room creates bottlenecks and makes the entire kitchen feel cramped and dysfunctional. Always respect the 100/120 cm clearance rule.
- Choosing the Wrong Stool Height. Buying bar-height stools for a counter-height island (or vice versa) is a frequent and costly mistake. Always measure your finished counter height before purchasing stools and ensure a 25-30 cm gap for legroom.
- Insufficient Overhang for Seating. An overhang of less than 30 cm is simply not enough for comfortable seating. It forces people to sit sideways or perch on the edge of the stool. Plan for a 30-38 cm overhang for knees.
- Poor Lighting Plan. A single overhead light is not enough. Without dedicated task lighting like pendants, the island surface will be in shadow, making prep work difficult and creating poor ambiance. Plan your lighting early.
- Forgetting About Power. An island without outlets is a missed opportunity. You'll end up running extension cords across the floor, which is both unsightly and a safety hazard. Integrate outlets from day one.
- Unbalanced Proportions. The island should be proportional to the kitchen. A tiny island in a huge kitchen looks lost, while a monolithic island in a small kitchen is overwhelming. It should feel balanced and intentional.
- Selecting Impractical Materials. Choosing a high-maintenance worktop like soft marble for a heavy-use family kitchen can lead to regret. Be realistic about your lifestyle and choose materials, like engineered quartz, that can handle it.
Pre-project checklist
Before you begin your project, run through this checklist to ensure you've covered all the bases. This is the same process we guide our clients through in Lisbon and beyond.
- [ ] Measure your total kitchen space accurately. Note the locations of doors, windows, and existing plumbing/electrical points.
- [ ] Define the primary functions of your island (e.g., dining, prep, storage, cooking).
- [ ] Use masking tape on the floor to mark out the potential size and position of your island. Live with it for a day or two to test the flow and clearances.
- [ ] Decide on the island height: counter, bar, or split-level.
- [ ] Determine how many people you want to seat and calculate the required length (60 cm per person).
- [ ] Create a list of desired features: sink, hob, specific storage needs (deep drawers, recycling bins), outlets.
- [ ] Collect inspiration images for the style, colour, and materials you like.
- [ ] Consider your lighting plan. Where will pendants hang? Will you need additional recessed lighting?
- [ ] Research worktop materials that suit your lifestyle and maintenance tolerance (e.g. Silestone vs. solid wood).
- [ ] Finalise the location and number of electrical outlets and any integrated USB ports.
How Mudelar Handles It
At Mudelar, designing and installing a kitchen island with stools is a core part of our turnkey renovation service. We manage the entire process, so you don't have to worry about coordinating different trades. It begins with a detailed on-site consultation where we discuss your needs and measure your space meticulously. Our design team then creates detailed 3D renderings, allowing you to visualise the island's proportions, materials, and how it integrates with the rest of your kitchen. This visual step is crucial for making confident decisions before any work begins.
Once the design is approved, our project manager coordinates everything: ordering materials from trusted suppliers like Compac and Egger, managing our skilled carpenters, electricians, and plumbers, and ensuring every detail is executed to the highest standard. From running new plumbing for an island sink to installing the perfect pendant lighting, we handle it all. Our goal is to make the process seamless and stress-free for you. To see how we can transform your kitchen, take a look at our services or learn more about us and our commitment to quality. When you are ready, you can request a free quote.
Frequently asked questions (FAQ)
How long does it take to install a kitchen island?
Installation of a pre-fabricated island can take 1-2 working days. However, a custom island that includes a worktop, sink, hob, and electrical work is part of a larger kitchen renovation. The island-specific work, within that project, typically takes about 3-5 working days, depending on the complexity of plumbing and electrical routing.
What is the minimum kitchen size for an island?
For a small, functional island (e.g., 120 cm x 60 cm) and the required 100 cm clearance on all sides, you generally need a kitchen that is at least 3.2 metres wide and around 4 metres long. Anything smaller, and a peninsula might be a more space-efficient solution to consider.
Do I need a permit to add a kitchen island in Portugal?
Generally, no. Adding a kitchen island is considered interior remodeling and does not typically require a municipal license (licença municipal) unless it involves structural changes to the building, or significant alterations to the plumbing or electrical systems that fall under specific regulations. For most island projects, a simple notification to the council (comunicação prévia) is not even required. We handle all compliance checks as part of our service.
What's the difference between an island and a peninsula?
A kitchen island is a freestanding unit with access on all four sides. A peninsula is similar but is fixed to a wall on one side, making it accessible from three sides. Peninsulas are an excellent alternative for smaller kitchens where a full island would not fit while still providing extra counter space and seating.
How do you clean and maintain an engineered quartz worktop?
Engineered quartz, like Silestone, is very low maintenance. For daily cleaning, simply use a soft cloth with warm water and a small amount of mild pH-neutral soap. Avoid using harsh chemicals, abrasive scourers, or bleach. While highly stain-resistant, it's still good practice to wipe up spills like wine or coffee promptly.
Is it better to have drawers or cupboards in a kitchen island?
For base cabinets, I almost always recommend deep, full-extension drawers over cupboards. They are far more ergonomic, allowing you to see and access everything inside—even items at the back—without having to crouch down and dig through the contents. Cupboards can be useful for taller or oddly shaped items.
How do I choose the right stool style for my kitchen?
Consider both ergonomics and aesthetics. Look for stools with footrests for better comfort. Backless stools are great as they tuck neatly under the counter and save space, but stools with a low back provide more support for longer periods of sitting. The material—be it wood, metal, or upholstered—should complement the other finishes in your kitchen.
Can a kitchen island be a different colour than my main cabinets?
Absolutely! It's a very popular and effective design strategy. Using a contrasting colour for the island (like a dark blue, green, or even black) can turn it into a beautiful focal point, adding depth and personality to your kitchen. It's a great way to inject colour without committing to it for all your cabinetry.
Conclusion
A thoughtfully designed kitchen island with stools is a transformative addition to any home, acting as the nexus for cooking, dining, and daily life. Success lies in the details: meticulous measurement, ergonomic planning, and smart material choices. By prioritising clearance, getting the height right for your stools, and integrating function with form, you create a feature that is not only beautiful but also a joy to use every day. From our experience in Porto to Lisbon, a well-executed island is the single most impactful investment you can make in your kitchen's utility and social appeal. If you’re ready to explore the possibilities for your home, I invite you to request a free quote with our team at Mudelar.
Ready to start your renovation?
Request a free, no-commitment quote. We reply within 24 hours.
Request a quoteLer em português: Ilha de Cozinha com Bancos 2026: Medidas Essenciais | Mudelar