
10 August 2026
Kitchen Island with Stools: Pro Sizing Guide 2026 | Mudelar
Designing a kitchen island with stools? My guide covers correct dimensions, clearance, and ergonomics for comfortable seating in your Lisbon home. Get a free quote.
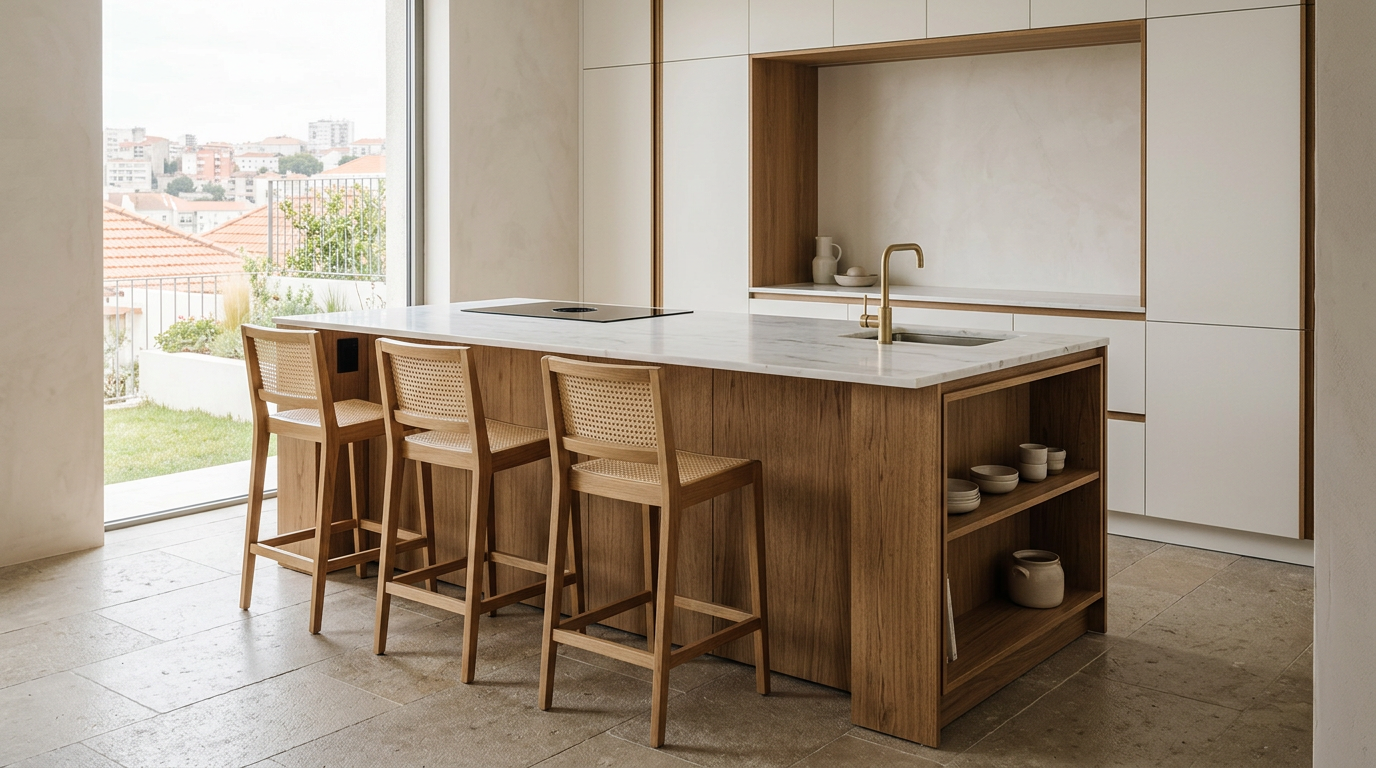
As a project manager for Mudelar, I’ve overseen countless kitchen renovations across Portugal, from spacious villas in Cascais to modern apartments in Lisbon. One feature consistently tops the wish list: a kitchen island with stools. It’s more than just extra counter space; it’s the new heart of the home, a place for morning coffee, homework sessions, and pre-dinner chats. However, getting it right is a science. An incorrectly sized island can disrupt workflow and feel uncomfortable. In this guide, I’ll share my hands-on experience to help you master the crucial details of sizing, clearance, and ergonomics, ensuring your new kitchen island is both beautiful and perfectly functional for your lifestyle.
Quick summary
- Standard Heights Matter: A standard kitchen counter-height island is about 90-95cm tall and pairs with counter stools (60-65cm seat height). A taller bar-height island (105-110cm) requires bar stools (75-80cm seat height).
- Clearance is King: Plan for at least 90-100cm of clearance for walkways around the island. For seating areas, you need a minimum of 90cm behind the stool, but 110cm is ideal for comfortable passage.
- Seating Space Rules: Allow at least 60cm of width per person for comfortable seating. A 180cm island can typically accommodate three stools.
- Ergonomics for Comfort: Ensure a countertop overhang of at least 30-38cm for adequate knee room. The difference between the seat height and countertop should be around 25-30cm.
- Functionality First: Before finalising the design, define the island’s primary roles. Will it house a sink, a hob, or primarily serve as a dining and prep area? This dictates its internal structure and utility needs.
- Material Synergy: Choose materials that complement your kitchen's overall design. An engineered quartz top from a brand like Silestone offers durability, while the island base can be crafted from moisture-resistant MDF for longevity.
Table of contents
- Understanding Kitchen Island Heights and Stool Types
- Essential Clearances: The Key to a Functional Layout
- Calculating Seating Capacity: How Many Stools Will Fit?
- Ergonomics of Seating: Comfort is Non-Negotiable
- Integrating Functionality: Beyond Just Seating
- Materials and Finishes for Your Island and Stools
Understanding Kitchen Island Heights and Stool Types
One of the first decisions in planning a kitchen island with stools is determining its height. This single measurement dictates the type of stools you'll need and influences the overall feel of your kitchen. There are two primary standards we work with in our projects across Lisbon and Porto, each with distinct advantages.
Most homeowners opt for a counter-height island. This means the island has the same height as the rest of your kitchen countertops, typically between 90cm and 95cm. The seamless look creates a cohesive, flowing workspace. It’s also more family-friendly, as it’s a more accessible height for children. For seating, you'll need counter stools, which have a seat height of around 60cm to 65cm. This height is generally considered very comfortable for dining, working, or socialising.
Alternatively, you could choose a bar-height island, or a multi-level island with a raised bar section. This section is taller, usually between 105cm and 110cm. This design clearly delineates the cooking zone from the socialising zone and can help hide kitchen clutter from the view of an adjacent living or dining area. For this setup, you need taller bar stools with a seat height of about 75cm to 80cm. While it creates a more dynamic, café-like atmosphere, the height can be less comfortable for long periods and less accessible for younger family members.
Counter-Height Islands
A counter-height island is the most popular choice for a reason. Its uniform height extends the kitchen’s main work surface, making it incredibly practical for food prep. When you're not using the stools, they can be tucked neatly underneath, and the surface becomes an expansive area for baking, serving a buffet, or laying out projects. This consistency is visually calming and makes the kitchen feel larger and more integrated. In our experience with renovations in areas like Setúbal, a single-level island is a versatile workhorse that adapts to a family's changing needs over time.
Bar-Height and Multi-Level Islands
A bar-height design introduces a different dynamic. The raised surface provides a visual barrier, which can be useful in open-plan homes to separate the 'working' part of the kitchen from the living space. Guests can gather around the bar without being in the chef's way. Some of the most effective designs we at Mudelar have implemented feature a two-tiered island: a lower counter-height section for prep work, often with a sink or hob, and a raised bar-height section for seating. This 'split-level' approach offers the best of both worlds, defining zones while maintaining a social connection.
Essential Clearances: The Key to a Functional Layout
Even the most beautiful island will fail if it's placed in a way that obstructs movement. Proper clearance—the space around the island—is the most critical factor for a safe and efficient kitchen layout. I always tell my clients that we must measure and plan these “invisible” pathways before we even think about materials. In a busy kitchen, these pathways are arteries for household traffic.
As a firm rule, we plan for a minimum of 90cm of clearance on all sides of the island. However, for a truly comfortable and functional space, especially in a multi-cook household, 110cm to 120cm is the gold standard. This wider gap allows two people to pass each other without turning sideways and provides enough room to comfortably open appliance doors (like ovens or dishwashers) without blocking the entire walkway. In smaller kitchens in historic buildings in Sintra or central Lisbon, we might have to work with the 90cm minimum, but it requires very careful planning.
Walkway and Work Aisles
We must differentiate between a simple walkway and a 'work aisle'. A walkway is a path for general traffic, for which 90cm might suffice. A work aisle is the space between the island and a main run of cabinets containing a key appliance like the cooker or sink. This zone sees the most action. Here, a wider clearance of 110cm is strongly recommended. It ensures you have enough space to pivot, bend down to the oven, and work without feeling cramped. Neglecting this is a recipe for daily frustration, something we work diligently to avoid in every Mudelar project.
Seating Clearance
Where your kitchen island has stools, the clearance rules change. You need to account for both the stool itself and the person sitting on it, plus space for people to walk behind. The absolute minimum clearance behind a seated person is 90cm. This allows someone to carefully edge past. For a truly comfortable arrangement where people can walk past without disrupting the seated person, you need 110cm. If the area behind the stools is a major thoroughfare, aim for 120cm or more. Always measure from the island's edge, not its base, to the wall or obstacle behind it.
Calculating Seating Capacity: How Many Stools Will Fit?
Once you’ve established your island's dimensions and ensured proper clearances, the next question is how many people you can comfortably seat. It’s tempting to squeeze in as many stools as possible, but this will lead to a cramped and unpleasant dining experience. The key is to provide enough personal space for each individual.
The industry standard is to allow 60cm of linear space per person. This provides sufficient elbow room for eating and conversing without feeling crowded. For a more generous and comfortable setup, especially if you plan to use the island for long meals or as a primary dining spot, you might consider extending this to 70cm per person. To calculate the number of stools, simply measure the length of the seating side of your island and divide it by 60 or 70.
For example, an island with a 180cm (1.8 metre) long seating area can comfortably fit three stools (180cm / 60cm = 3). A 240cm (2.4 metre) island could accommodate four. It's also important to consider the space at the ends of the island. If you have stools at a corner, you need to allow extra room to avoid knees bumping. We typically add an extra 30cm of clearance for a corner seat. This attention to detail ensures the final layout is practical for everyday use.
Considering Stool Width and Style
The 60cm rule is a guideline based on the average person's shoulder width. However, the physical size of your chosen stools also plays a part. Slim, backless stools take up less visual and physical space than wide, upholstered stools with armrests. If you opt for larger, more luxurious seating, you may need to reduce the number of stools to maintain a comfortable spacing. Always check the specifications of the stools you are considering before finalising the island design. Laying out templates on the floor can be a great way to visualise the final arrangement.
Planning for Corners and Ends
Seating arrangements aren't limited to a single straight line. L-shaped or T-shaped seating on a larger island can create a more convivial, conversational atmosphere. When planning seating around a corner, the person on the corner needs adequate legroom without clashing with the person next to them. A good rule of thumb is to ensure at least 40cm of clear leg space on each side of the corner. Planning for these details in the design phase is what separates a standard kitchen from a truly bespoke one.
Ergonomics of Seating: Comfort is Non-Negotiable
Ergonomics is the science of designing for human comfort and efficiency. For a kitchen island with stools, this translates into specific dimensions that ensure seating is a pleasure, not a pain. The relationship between the countertop height, stool height, and legroom is paramount. Get this wrong, and your island seating will go unused.
The most crucial ergonomic measurement is the countertop overhang. This is the portion of the countertop that extends beyond the island's base, creating space for your knees. Without an adequate overhang, you'll be forced to sit sideways or perch uncomfortably on the edge of the stool. For counter-height islands (90-95cm), we recommend a minimum overhang of 38cm for comfortable seating. For higher bar-height islands (105-110cm), you can get away with a slightly smaller overhang of 30cm.
Another key dimension is the space between the top of the stool's seat and the underside of the countertop. This gap should be between 25cm and 30cm. It provides enough room for your thighs without making you feel like you're sitting too low at the counter. This is why matching the correct stool type to the island height is so important. A counter stool is too low for a bar-height island, and a bar stool is too high for a counter-height one.
The Importance of Footrests
When sitting on a stool, your feet won't touch the floor. A footrest is therefore not an optional extra; it's an ergonomic necessity. It provides stability and support, taking pressure off the backs of your thighs and improving posture. Most well-designed stools have a built-in footrest. The ideal distance between the seat and the footrest is around 40-45cm. If your stools don't have an integrated footrest, you could even consider building a rail into the island base itself, a detail we often incorporate in our custom designs in the Braga and Aveiro regions.
Back Support and Swivel Features
The choice between backless stools and those with back support depends on how you intend to use the seating. For quick breakfasts or perching, backless stools are fine and have the advantage of tucking completely under the overhang, creating a clean look. However, if you envision long dinners, working from home, or extended social gatherings at your island, stools with back support are essential for comfort. Similarly, a swivel feature can be very practical, allowing people to turn and converse with others in the kitchen or an adjacent room without having to move the entire stool.
Integrating Functionality: Beyond Just Seating
A modern kitchen island is a multi-functional hub. While seating is a key feature, its design should also incorporate other essential functions to maximise its utility. Before we finalise any drawings at Mudelar, we have a detailed discussion with the client about how they envision using the space. Will it be the primary zone for food prep? Will it house appliances? Does it need to be a homework station? The answers to these questions shape the final form.
Storage is a major consideration. The base of the island offers a huge amount of potential storage space. We can integrate deep drawers for pots and pans, shallow drawers for cutlery and linens, open shelving for cookbooks, or even specialised wine fridges and pull-out bins. A well-designed island can significantly reduce clutter in the rest of your kitchen. The side facing the main work area is ideal for functional storage, while the seating side can feature shallower cabinets or decorative shelves.
Many of our projects in new builds around Amadora and Loures involve integrating appliances directly into the island. A second sink for prep work is a popular addition, creating a highly efficient work zone separate from the main clean-up sink. You can also install a hob, but this requires careful planning for ventilation. A ceiling-mounted or downdraft extractor fan is necessary, which will influence the project's complexity. We can also build in under-counter ovens, microwaves, or dishwashers to enhance the kitchen’s workflow.
Power and Lighting
In today's connected world, access to power is non-negotiable. We always recommend integrating electrical outlets into the island. These can be discreetly placed on the side panels or incorporated as pop-up outlets on the countertop itself. This is essential for using small appliances like blenders or mixers, as well as for charging laptops and phones. Planning the electrical wiring early in the process is crucial. Good lighting is also key. Pendant lights hung over the island not only provide essential task lighting for the work surface but also create a strong design statement and define the island as a focal point.
The Work Triangle and Zones
The kitchen island can fundamentally change the classic 'work triangle' (the path between the sink, cooker, and refrigerator). It can form one point of the triangle, for example, if it houses the sink or hob. Alternatively, it can create a 'zone' based layout, with different areas dedicated to prepping, cooking, and cleaning. The design of your kitchen island with stools must work in harmony with the overall layout to create an intuitive and ergonomic flow. We use our expertise to map out these workflows to ensure your new kitchen is a joy to work in.
Materials and Finishes for Your Island and Stools
Request a free, no-commitment quote. We reply within 24 hours.
Request a quote →The materials you choose for your kitchen island countertop and base will define its look, durability, and maintenance requirements. In Portugal, we have access to a fantastic range of high-quality materials to suit any style, from rustic charm to sleek modernism. The countertop is the workhorse, so it needs to be tough. Brands like Silestone and Compac offer excellent engineered quartz options that are non-porous, stain-resistant, and available in a huge array of colours and patterns.
For the island's base structure, moisture-resistant MDF is a versatile and stable choice, which can then be lacquered in any colour or finished with wood veneer or decorative panels. For a more industrial look, we might use metal frames. The goal is to choose materials that not only look good but can also withstand the rigours of a busy kitchen environment. For stools, the choice is vast, from solid wood to metal frames with leather or fabric upholstery. The key is to choose a material that complements the island and is easy to clean.
Recommended materials and options
| Type | Features | When to choose |
|---|---|---|
| Engineered Quartz | Non-porous, highly resistant to scratches and stains. Consistent colour and pattern (e.g., Silestone, Compac). | For a low-maintenance, highly durable surface in a busy family kitchen. Ideal for a clean, contemporary look. |
| Natural Stone | Unique, natural veining (Marble, Granite). Granite is very durable; Marble is softer and can stain. | When you want a one-of-a-kind, luxurious statement piece. Granite for durability, Marble for high-end aesthetics. |
| Solid Wood | Warm, natural aesthetic. Requires regular sealing/oiling. Can be scratched but is also repairable. | For a rustic, traditional, or Scandinavian feel. Adds warmth and character. Best for those who enjoy maintenance. |
| High-Pressure Laminate | Budget-friendly and available in many finishes, including realistic wood and stone effects (e.g., Egger, Kronospan). | When you want a specific look without the maintenance or want to manage project funds for other features. |
| Stainless Steel | Hygienic, heat-resistant, and waterproof. The choice of professional kitchens. Shows fingerprints and scratches. | For a professional, industrial, or ultra-modern kitchen. Perfect for those who love to cook seriously. |
Quick comparison
| Feature | Counter-Height Island (90-95cm) | Bar-Height Island (105-110cm) |
|---|---|---|
| Stool Type | Counter Stools (60-65cm seat height) | Bar Stools (75-80cm seat height) |
| Best For | Families with children, food prep, baking, casual dining. | Entertaining, separating kitchen/living spaces, creating a 'bar' feel. |
| Visual Impact | Creates a seamless, expansive work surface. Makes the kitchen feel larger. | Creates a visual barrier and a more dynamic, multi-level look. |
| Comfort | Generally more comfortable for longer periods of sitting and dining. | Can be less comfortable for long meals; feet are further from the floor. |
| Versatility | The surface is an extension of the main workspace. Highly versatile. | Primarily a social/dining zone, less practical as a primary prep area. |
Common mistakes to avoid
Over the years, I've been called in to fix or advise on kitchen islands that just don't work. Here are the most common mistakes I see people make:
- Ignoring Clearances. This is the number one error. An island that is too big for the room creates bottlenecks and makes the entire kitchen feel cramped and dysfunctional. Always prioritise comfortable walkways over a massive island.
- Insufficient Countertop Overhang. A shallow overhang of just 15-20cm is not enough for comfortable seating. It forces people to sit hunched over or sideways, so they won't use the seating. A minimum of 30-38cm for knee room is non-negotiable.
- Choosing the Wrong Stool Height. Buying bar stools for a counter-height island (or vice-versa) is a frequent and frustrating mistake. This makes sitting awkward and uncomfortable. Always measure your island height before purchasing stools.
- Poor Lighting Plan. A large island can cast a shadow on the workspace below if there's only ambient ceiling light. A dedicated lighting plan with pendant lights or spotlights directly above the island is essential for both tasks and atmosphere.
- Forgetting Power Outlets. Not planning for electricity in the island is a huge missed opportunity. In our modern lives, having a place to plug in a laptop, phone charger, or small appliance is a necessity, not a luxury.
- Creating a 'Barrier' Island. Placing an island directly in the path between the sink, fridge, and cooker can ruin the kitchen's workflow. The island should aid the work triangle, not obstruct it.
- Choosing Style Over Substance. Opting for a beautiful but impractical countertop material, like soft marble in a heavy-use family kitchen, can lead to regret. Balance aesthetics with durability and maintenance needs.
Pre-project checklist
Before you call a professional, thinking through these points will make the design process much smoother and ensure the final result meets your needs.
- Measure Your Kitchen: Take basic measurements of your kitchen's length and width. Note the positions of doors, windows, and existing plumbing/gas lines.
- Define the Island's Purpose: Make a list. Is it primarily for seating, food prep, cooking, storage, or entertaining? Rank these in order of importance.
- Count the Users: How many people live in your house? How many people do you want to seat at the island regularly?
- Analyse Your Workflow: Think about how you currently use your kitchen. What works and what doesn't? Where do you wish you had more space?
- Gather Inspiration: Collect images of kitchen islands you love. This helps you communicate your desired style and features to your designer.
- List Your 'Must-Haves': Do you absolutely need a sink in the island? A wine fridge? Deep drawers for pots? Make a clear list.
- Consider Your Stool Style: Browse different types of stools. Do you prefer backless, with a back, upholstered, wood, or metal? The style will influence the overall design.
- Think About Utilities: Do you want a hob (requiring ventilation), a sink (requiring plumbing), and electrical outlets? Note these down.
How Mudelar handles it
At Mudelar, we believe that a successful kitchen island project is born from meticulous planning. Our turnkey approach means we handle every single detail, from the initial design consultation to the final installation. We start by listening to your needs and analysing your space in your home, whether you're in Lisbon or the Algarve. We then create detailed 3D renderings so you can visualise exactly how your kitchen island with stools will look and function within your layout, ensuring all clearances and ergonomic dimensions are perfect.
Our experienced team of architects, designers, and certified craftsmen manages all aspects of the job, including any necessary plumbing, electrical work, and ventilation for hobs. We source high-quality materials from trusted suppliers like Silestone and Egger and build your island to the highest standards. To explore our process further, see our services and learn more about us. When you're ready to transform your kitchen, we're here to guide you. Simply request a free quote to get started.
Frequently asked questions (FAQ)
How much space do you need for a kitchen island with seating?
You need enough space for the island itself plus adequate clearance around it. A good rule is to have at least a 3.5m x 4m room to comfortably fit a modest island with seating and maintain functional walkways. For walkways, you need a minimum of 90-100cm. For the seating side, you need at least 90cm behind the stools, but 110cm is much better for allowing people to walk past.
What is the standard height for a kitchen island with stools?
There are two standards. A 'counter-height' island is the most common, matching the rest of your kitchen counters at around 90-95cm tall. This pairs with counter stools (60-65cm seat height). A 'bar-height' island is taller, around 105-110cm, and requires taller bar stools (75-80cm seat height). The choice depends on your desired aesthetic and functional needs.
How much overhang should a kitchen island have for seating?
For comfortable knee room, the countertop overhang is critical. For a standard 90-95cm counter-height island, you should plan for an overhang of at least 38cm. For a taller, 105-110cm bar-height island, you can have a slightly smaller overhang of about 30cm. Anything less than this will make seating uncomfortable for extended periods.
What's the difference between counter stools and bar stools?
The difference is purely their height, designed to match the two standard island heights. Counter stools have a seat height of approximately 60-65cm to fit under a 90-95cm counter. Bar stools are taller, with a seat height of around 75-80cm, designed for a 105-110cm bar. Using the wrong stool for your counter height will result in an uncomfortable, awkward seating position.
Do I need a permit to install a kitchen island in Portugal?
Generally, for a simple island installation without structural changes, you do not need a municipal permit (licença). However, if the project involves moving walls, or significantly altering the plumbing, electrical or gas systems, a 'Comunicação Prévia' or 'Licença de Obras' might be required depending on the scope. At Mudelar, we assess this as part of our process and handle all necessary paperwork for our clients.
How do you choose the right stools for a kitchen island?
First, match the stool height to your island height (counter or bar). Then, consider function and comfort: if you'll sit for long periods, choose stools with back and footrests. For style, consider materials that complement your kitchen – wood for warmth, metal for an industrial look, or upholstery for comfort and colour. Finally, measure their width to ensure you can fit the desired number of stools with enough elbow room.
Is a kitchen island with seating a good idea for a small kitchen?
It can be, but it must be scaled appropriately. A slim, peninsula-style island attached to a wall can provide seating and prep space without overwhelming the room. A small, movable butcher block on wheels can also be a flexible option. The key is to ensure you maintain the minimum 90cm clearance for walkways. A poorly planned island will make a small kitchen feel even smaller.
How can I add power outlets to a kitchen island?
Integrating power outlets should be planned during the design phase. An electrician must run wiring under the floor or through the ceiling (depending on your home's construction) to the island's location before it's installed. The outlets can then be installed on the side panels of the island, or you can opt for more modern solutions like pop-up power strips that recess into the countertop.
Conclusion
Planning a kitchen island with stools is a balancing act between aesthetics, ergonomics, and spatial awareness. As we've seen, success lies in the details: the height of the counter, the depth of the overhang, and the crucial centimetres of clearance that make a kitchen flow. By prioritising a functional layout and comfortable seating dimensions, you create a feature that will truly enhance your home and daily life. It’s the heart of your kitchen, and it deserves to be planned with care and expertise. If you're in Lisbon, Porto, or anywhere in Portugal and are ready to create the perfect island for your kitchen, our team at Mudelar is here to help. Request a free quote today, and let's start designing the heart of your home together.
Ready to start your renovation?
Request a free, no-commitment quote. We reply within 24 hours.
Request a quoteLer em português: Ilha de Cozinha com Bancos: Guia de Medidas 2026 | Mudelar